Showing posts with label gift wrapping. Show all posts

Wednesday, 8 January 2020

Card for a Christening

Hi Crafters, 

today, I'd like to show you a very simple card, I created for a Christening in the family a while back. This baby by the way, is none of my nieces, he's my great-nephew - yes, my sister is a granny. Am I getting old?

I was running a bit late, and we still had travel arrangements to make, so I kept it very simple, with little patterned paper banners. I don't think it needs much explanation, it's pretty straight forward...


By the way, the card matched our gift.

The parents only asked for money, but I wanted to at least present that in a special way. So I created a hot air balloon and decorated it with banners from the same papers. It can be hung up in the baby's room just as it is, or even be turned into an actual lamp (which is what the parents did). And the raccoon was holding the envelope.

Should have taken the picture from the other side, that looked better, but it's too late for that now... 


Lots of Love
Ela


Friday, 20 September 2019

3rd time aunt - cards and gifts

Hey Crafters, 

today is a happy day, my third niece was born last night, just before 11 pm. Only one day after grandpa's Birthday and an easy date to remember. Both, mother and child are healthy and Happy.

The news of my sister-in-law in hospital left me frantically busy, because - guess what - with a 10 month delivery time, I had neither the gift nor the card completely ready. All planned out though, but not completed. 

So, first things first, here is the card. 


I wanted something clean an simple and had that idea of a landscape card with the name across it in the lower third and some embossing paste stencilling in the background. Turned out, the name is too short, it just didn't fill enough space, with the only large letter cutting dies I own. So I changed the plan to portrait, with otherwise much the same concept. To make the letters shine, I ink blended an ombre effect. I probably should have gone a bit darker near the lower edge.

The changed format left way too much empty space at the top of the card, so I needed a cute image to fill it.

Checking my options I decided on the adorable Mama and Baby bear. I coloured them with alcohol markers, which I hadn't done in quite a while. I almost gave up, it just didn't seem to work, but in the end I persevered and I think the final result is okay. 

I added a black sentiment strip that says "Hallo", to spell out "Hallo Luise" and to tie in the black outlines of the image. I originally wanted to spell "Welcome", but Hello was the best I could find in my stash. 

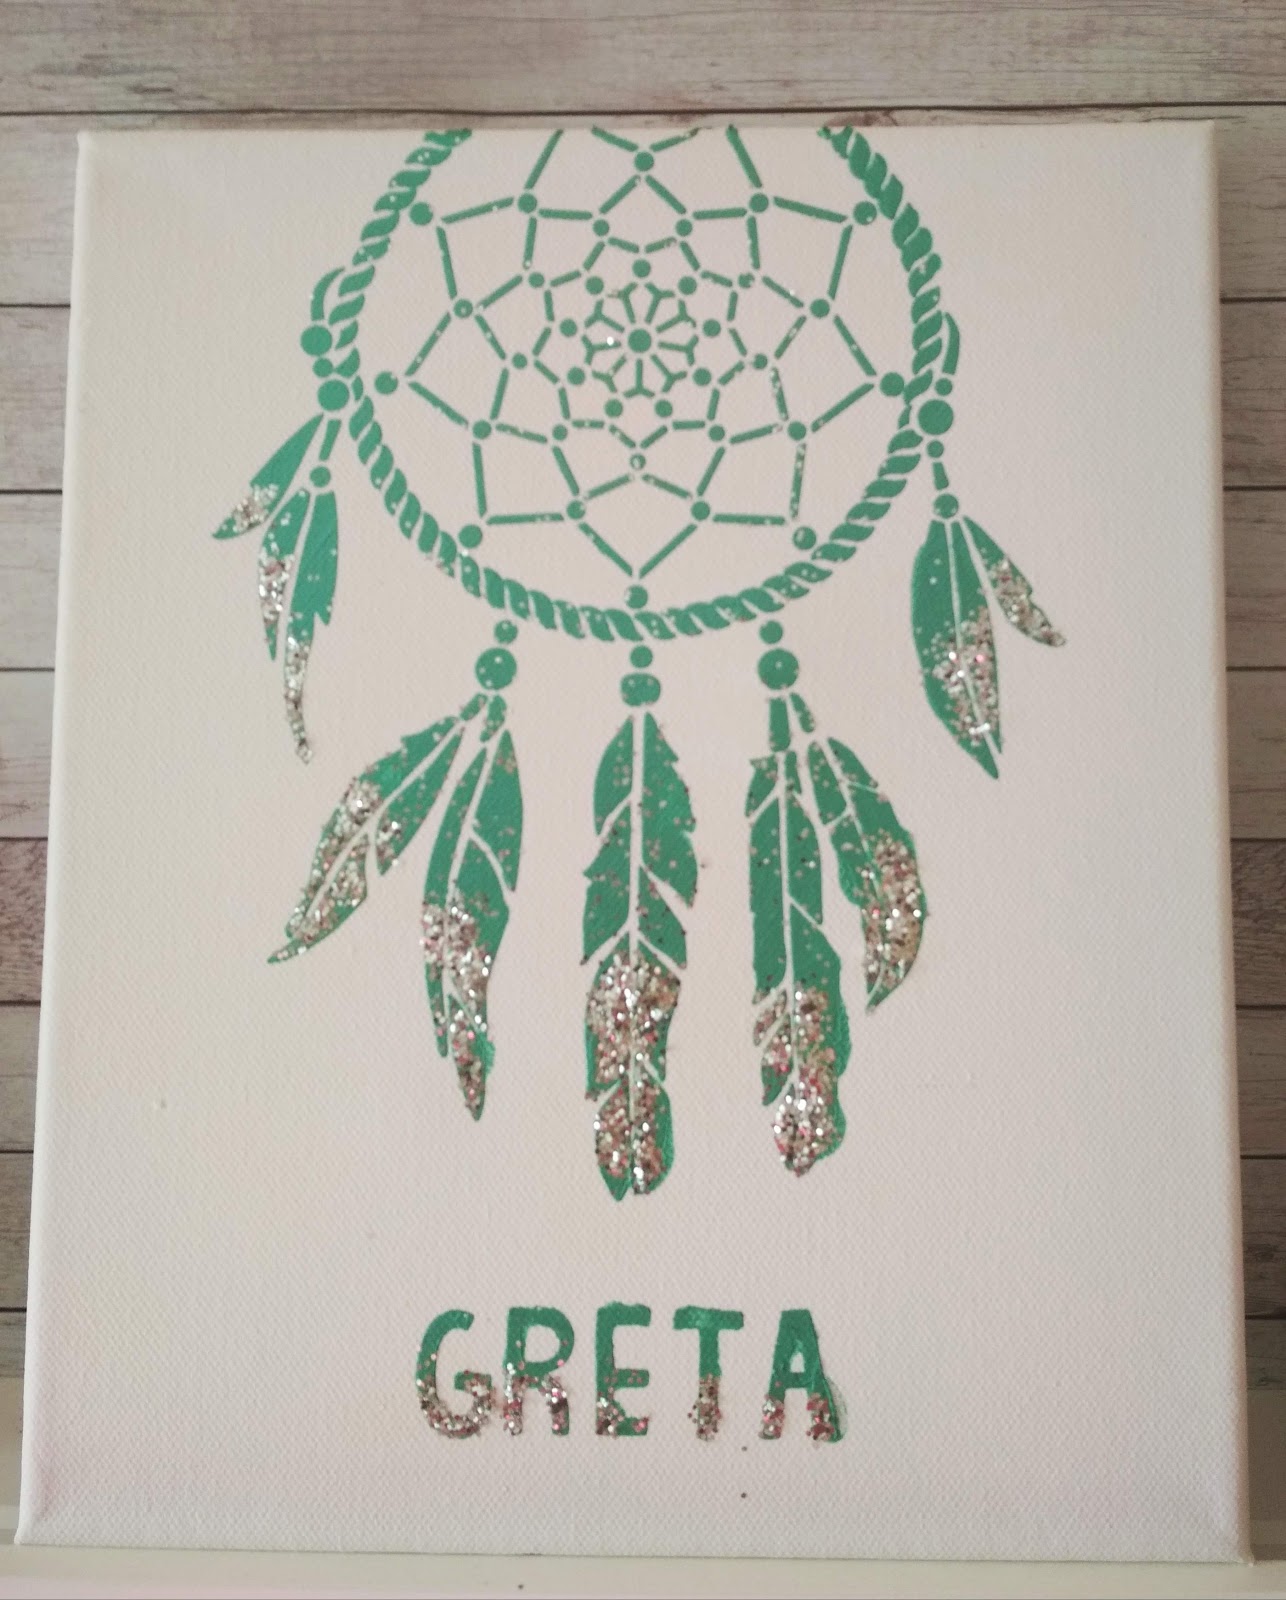
While the embossing paste still dried, I cleared up my stencil and happened to glance at a larger stencil in my stash, that I used on some T-Shirts for my daughters. That sparked the idea, to create a canvas as well. I happened to have 2 canvases of the same size, so I created one for the Baby and one for the older sister as well. 
I actually would have liked to do an ombre here as well, but I didn't have matching colours, so I glittered it up instead.


And finally, here is my first ever diaper cake. I had the ingredients lying around for ages, except for the diapers, which I only bought yesterday. 


Well, that's it from me, I need to get to work, it's going to be a busy day, especially since the happy parents are already home and  ready for visitors. 


Lots of love
Auntie Ela


Challenges:
AAA Cards: #149 - Up to One Third
CAS(E) this Sketch: #340  (it's a bit loose, I hope it still counts) 


Saturday, 26 March 2016

Happy Easter and another bunny

Hello Crafters,

Just a very quick note from me:  one of my girls was ill last week, therefore I had no time for anything much. But at least I created another one of the little gift wraps, because as you know, I have two daughters...

So I did the other one the same way, only in different colours and stamped the other way round.


Wishing you all a very happy Easter!
Ela

Sunday, 20 March 2016

Challenge up your life: Challenge #37: Bunnies

Hello Crafters,

it's time again for another Challenge at: 


Ready for Easter, we are looking for Bunnies for the next two weeks.


Challenge #37 Bunny


Of course I used my favourite Bunny, from Purple Onions Design, and I wanted to use my brand new set of  Polychromos pencils. Yeah, I know, I said I would make do without. But my sister-in-law gave them to me for my Birthday a while ago. And I love them, THANKS!


I thought a little gift box for Easter would be nice, so I picked a bright orange card stock, die cut the pillow box and stamped and coloured directly on the box, without a belly band this time.

I thought blue would go well with the bright orange, and I think I was right.


So, show us all your bunnies, and don't forget to check out what the other ladies created.

Hugs
Ela  

Wednesday, 20 January 2016

Happy new year and Christmas 2016

Hi Crafters,  

better late than never I’d like to wish you all the best for the new year. Hope you all had a good start.  

As you may have noticed, I have been posting very rarely in the past months. That is mostly due to quite some health problems within the family, that took a lot of my energy.

Also, I fear, that this will not be solved quickly, so I apologize in advance for not posting very regularly. Though I will try.

I didn’t even manage to create the Christmas cards I had planned for this year. I mostly used cards I had left over from last year. Which isn't all that bad, because after all I didn't created them, to collect dust. 

As I do every year, I promised myself not to let next Christmas be as stressful as the last, so I decided start creating NOW, while I am still in the mood. And as I had bought the supplies already, I used them.

So, here they are, officially the first cards for Christmas 2016. 


This Teddy was actually coloured by one of my daughters.
She graciously allowed my to use it for our Christmas cards. Thanks Love!


 The idea to stamp and colour on wood is from Jennifer McGuire. Thanks Jen, you’re always such an inspiration! 

I stamped the images with Archival ink and them with my Inktense Pencils. I did all the shading dry and wet the wood afterwards to activate the colour (except where I used white). In some places I applied a second layer after it had dried again.

Then I drilled a whole in the wood and added the twine, so the recipients can hang it as an ornament.  

The whole panel is adhered to the dry embossed, very simple card front with a glue dot and the string with a second glue dot in the back.

As you can see, I didn't use a sentiment, I just wanted to focus on the ornament. That is also the reason, why I kept the card base very plain. 
As I couldn't use a standard envelope for this, I created simple boxes with my envelope punch board from red cardstock. Then I heat embossed the trees and ornament to tie in trees on the embossed card base.


 I created three similar cards the same way for my close family (so they will obviously get different cards), but I failed to take pictures, so I can't show these. Sorry.
And as I ordered the wrong size wood chips on the internet, I also created tags the same way. I thought, I could show you most of these, because we celebrated at my place and all the gift wrapping was left here, but it seems my family liked the wooden tags and kept most of them. So I can show you only a few of them…  


Hope you all have a great year
Hugs
Ela


Saturday, 3 October 2015

Challenge up your life: Challenge #25 Treat bag

Hello Crafters,

once again I really had trouble finding time to craft, so today I am late to upload my inspiration for a treat bag.


This time, we're challenging you to create a treat bag of any kind:


Challenge #25 Treat bag


I had Halloween in mind, with bright orange, but didn't want to reproduce what I did last year. Unfortunately it now turned out as a re-do of what I made only a few weeks ago. I really need to get my mojo back. 


I used my pillow box die, because I thought it's the perfect site for a treat bag. I die cut the box in yellowy orange and created a belt for it, sponging the back ground and colouring the lanterns with yellow and orange alcohol markers. 

It's not highly original, but I still like it.
Hope you have a more create time than I do right now.

Love
Ela

Tuesday, 23 June 2015

Private Investigators Birthday

Hi Everyone,

it's time to show you what I've been doing those past weeks. 

It's been my girls' Birthday last week so I spend the last few weeks with preparations. The motto was private investigators. Here are the invitations I created.


Very simple, I printed the word (it means Invitation) in red on white card stock and cut the card stock to panels. The font is called "Top Secret". Then I stamped the foot prints all over the panel and adhered it to a grey card base. The stamps I already had left over from a previous project. I cut them myself from fun foam.

I printed the words "Streng Geheim" (Top Secret) in the same font and colour across the envelopes, but unfortunately forgot to take a picture of them.

Next task were the giveaway bags. I got some sweets, cheap toy handcuffs and invisible pens (to be read in black light) for all of the kids. I also printed out a Caesar cipher disc from the Internet and I got a bunch of little note pads, that I made into personalised note books. I am pretty proud of these. 


I cut and scored a black card stock cover to match the pad and stamped the front and back with white foot prints. Then I adhered the red die cut letters (Tim Holtz Alphabetical) to the front, mixing upper and lower case letters. 
In order to get the letters straight, I always arrange them and then use a strip of post-it tape to keep the spacing, leaving the lower edge free of tape, so I can see were exactly I place the word. Then I use liquid glue to adhere them down and let them dry a bit before removing the tape carefully. On the next picture you can see how the note books look when opened.

Of course all those goodies needed to go in a bag. Usually I use small store-bought gift bags and modify them to match the motto, but there are no black gift bags, at least not where I live. So I had to think of something else. Luckily I still had plain white treat bags, about the size to fit a card. 

I needed a good way to close them, therefore I die cut the Stampin' Up "Top Note" die from black card stock and scored it in half. Then I stamped white foot prints across it.
With the books personalised, I needed name tags on the gift bags, but I didn't want to go through all the fuzz with the die cut letters again (we had invited 16! kids...). Therefore I just printed the names, cut them out and adhered them to the black card stock.


Then I filled the bags and stapled the card stock over the top. The hand cuffs didn't fit in, so I used a piece of baker's twine to keep keys and cuffs together and attached them to the bag with another staple, hidden underneath the black top.

For the day itself we prepared a little treasure hunt or actually a private investigator training programme, including games for team work, agility, speed etc. We also included the cipher disc and invisible pen that would be in the treat bags at the end, so they had to decode and puzzle a little as we went along. 

At the beginning of the party we took a picture of each child, so before leaving, they would not only get their "set of basic equipment" (the treat bags), but also their personal "Private Investigator ID card".

I had prepared a word file ready for print with all the cards already filled in, so that I had to add only the pictures during the party. The photo would be were the fingerprint is in my example. After printing I just had to cut them with my guillotine, round the corners and put them in their clips.

We had a great day, the kids loved it all. 

So, that's it from me for today, have a great day
Ela

Sunday, 21 December 2014

Gift wrapping mania

Hi Crafters,

today I am almost back on schedule with my Christmas preparations, thanks to my still ill daughther, who woke me early on Saturday morning to ensure my bed sheets got washed again. I'll spare you the details. As I didn't have a bed to sleep in anymore, I got up at 6:00 and started gift wrapping, so I got a whole lot done on Saturday.
Today was not as productive, but still pretty busy. We decorated the tree for my in-laws, bought our tree, visited some friends with little gifts and I started creating more wrapping paper. That's still on my schedule for tonight.

But  before I start, I'll just quickly show you the some of what I did yesterday...

The first set are made from little flat white bags, for cards or small juwelry. I wrote Merry Christmas at an angle all over them and tied them shut with red ribbon to which I added a few small bells or baubles and the tag.  The one on the far left is different, that's from one of my daughters to the other. We stamped snowflakes all over the bag and closed it with a blue fuzzy ribbon. The tag is colored by my daughter.


The next is very simple, I kept the white paper and tied a bright pink ribbon around several times. You might guess, it's for a girl. Therefore the tag is kept in pink as well. 


The next one was rather large, so I devided for something quicker and splattered the paper with colored inks for my mister bottles. 


Now, I need to get the ones for my own kids done. 


Hope you have a less busy time!
Ela

Friday, 19 December 2014

Homemade wrapping paper

Hi Crafters,

thanks for all of your good wishes, for our family health. I really appreciate that you care. Times are so careless in many respects, it's good to see that in the card making community it's different.

My girls and I visited my mother-in-law today and her son spoke a word or two with her doctor, so things are a bit clearer now. It's been no stroke like we feared. She will recover and is already feeling better again, though she's by far not up to her usual self. We're all very relieved and hope that she'll be back by Christmas eve (in Germany we celebrate on the 24th, not the 25th).


I also made some progress today with my preparations. After work and the hospital visit, my girls and I went on a longish Christmas shopping trip to the supermarket, to get all things that needn't be  bought at the last minute. And then we spent all evening creating our own wrapping papers and wrapping the most urgent presents, those that need to go in the mail. 

The first one is for my Mum. I wrote Merry Christmas all over the paper at a diagonal, with a black calligraphy pen. Then I traced the words messily with a normal silver gel pen, to make it more festive. I really do like how it turned out, even though I usually don't like my own handwriting much.


This next gift is for a 5 year old girl, so I picked one of my pre-made tags and matched the colors on the paper to it. I cut a piece of paper to fit the gift, wrapped it the way I wanted it, but without glueing it down. Then I traced a curly line with a pencil and flattened out the paper again, to stamp and color the Christmas lights. That was a bit tricky, because the paper absorbs the alcohol markers a lot more than the cardstock I usually use, so I had to make sure not to color too close to the lines. I think I really would like it better without the bow, but I needed something to hold tha candy cane...


The third gift is for her older brother, so I chose a blue-green tag. Not wanting to do the lights again, I chose the Lawn Fawn snowflake set and aranged all the snowflakes except the negative one on my stamp press and stamped them all over the paper in blue ink. I love how well that went. Those snowflakes are so playful. 
When I had it all wrapped up, I realized I forgot part of the gift, so I packed that in a piece of white paper and stamped a single blue snowflake on top, to set it apart from the main present. Then I tucked in the little piece below the candy cane.


The forth paper was created by my daughters, with a lot of fuzz and discussion. I didn't want to cover too much of the design, because I really like how the stars turned out, so uneven and sketchy. So I didn't add a bow but only a small snowflake to hold the tag.


There's more to come, but for today I am done. Tomorrow the girls will spend the day with their Dad and Grandpa, so I'll be free to really get back in schedule - hopefully.


Have a great time
Ela


Challenges:
Come and get it: Merry Christmas
Pile it on: #49 Anything goes Christmas
That craft place: Christmas
A crafty mess: #2 Anything goes Christmas

Thursday, 18 December 2014

Christmas preparations

Hey Crafters, 

I must apologize, it's been very quiet here lately. You'll probably have guessed it: Christmas is coming fast and I am - again - behind in my preparations. Every year I promise myself to get going early. Every year I think it must be possible, to do it all, before it starts to get stressful.
And I made a good start too, I had most of my cards ready in November. 

But as usual, Christmas has crept up quietly and now it's stabbing me in the back. 

I had a booth at a local craft fair for two evenings last week-end, which kept me busy with preparations for quite a while. It was the first time ever for me. Unfortunately I can't say I sold all that much. But it sure was way more fun than I had expected. The other crafters and artists were really, really nice and welcoming, and I am considering to join their Easter fair this year, even though it really didn't pay.  


My daughters have been ill, one after the other which has ruined my plans entirely. I couldn't do any Christmas shopping for 4 weeks, because I always had a sick child at home, and they were really weak and feverish. I've changed and washed piles of bed sheets, because if no kid was sick on them, then surely the cat would step in. 

And if that hadn't been enough, my mother-in-law had to be brought to hospital in an ambulance this week. We're not yet sure what and how bad it is, we just have to hope that she'll be better soon.

But despite all difficulties, I'll get there in the end. The school holidays are close, tomorrow is the last day of school, and I only have 3 more workdays to go. Also I did a lot of shopping yesterday, with my sick child in tow (poor thing), and completed the rest of it today, when their Dad was looking after them for me. 

Now I only have to buy the tree, wrap all the presents (which includes creating my own wrapping paper this year  - stupid me), write and send the cards and those gifts that need to go in the mail. And plan (and shop) the Christmas dinner, which has fallen to me now. Poor family, I'm no good in  the kitchen. 
Boy, I better don't think of it, the longer I think, the longer the list gets...

Anyhow, I managed to craft something today. As teacher's gifts are due tomorrow I created 7 little tags to go with them. I didn't use the tags I had, because I wanted them to go with the candles, but my girls wanted to use the cat stamps. So I compromised on the cat tangled in Christmas lights. On the back they say "Merry Christmas and a happy new year" and the names of my girls.

Here's a picture of the tags. I colored all different cats, but kept the light bulbs all in red and green, because that's what I used on the candles.


And here one of the whole gift with the wrapping and Phoebe. 


I absolutely love those Newton's Nook cats, they are so cute, without being too cutesy. 

I wish you all a relaxed and healthy Christmas time. I'll try to post some more the next days, but I simply can't promise.


Love
Ela


Challenges:
Muse: #98  


Saturday, 6 September 2014

It's a Ninja week

Hey Crafters,

today was the big Ninja party, so I want to show you the last few pieces I created for it.

I completed my little bookmarks by laminating them and adding a little bast to the top.


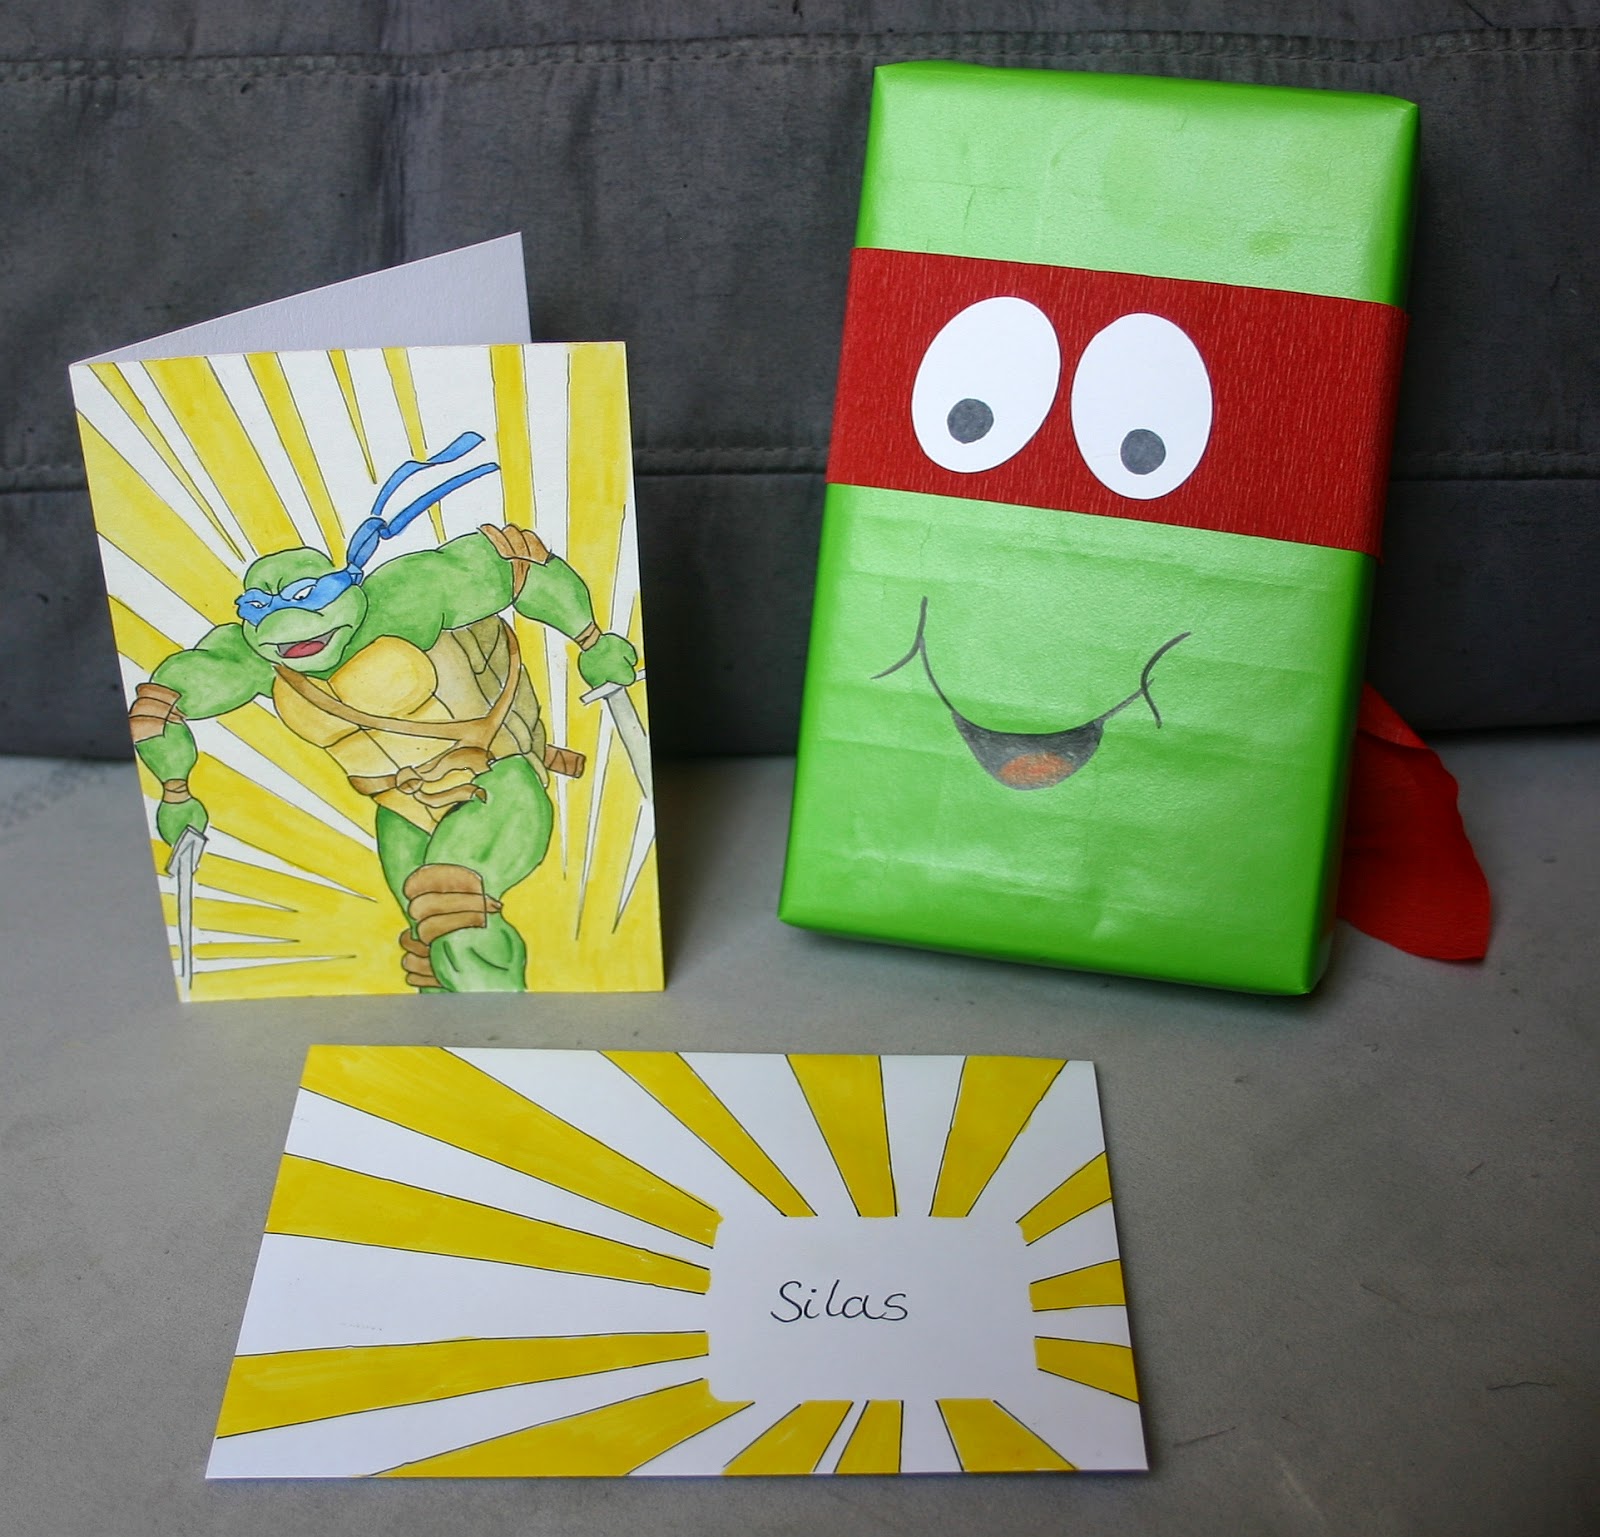
I also created a card, with a print from the Internet that I watercolored with my inktense pencils. I am very pleased with my coloring this time. I drew the same rays on the envelop with a copic liner and colored them with waterbased markers.

Then I wrapped the gift with green wrapping paper drew the mouth and stuck on crepe paper and eyes for the mask.


Have good week-end
Ela

Thursday, 4 September 2014

Ninja Turtles Birthday Party

Hello Everyone,

a few days ago I shared these Ninja Turtle goodie bags, that I created to help a friend with her birthday preparations.

I met that friend yesterday, and she's totally stressed out, so I offered her more help and created  and created bookmarks and a cup game in the same style. 

The bookmarks are not yet done completely, I still need to laminate them and add some ribbon or something to the top. But I don't own a laminator and have to borrow one first. But here they are almost ready. I didn't use cardstock for the masks and eyes, because last time I laminated bookmarks, the cardstock made them a little too bulky. So I used thin colored paper. Unfortunately I had run out of blue and purple, so there are only red and orange turtles. But as these go in the goodie bags, that  won't matter... 


I don't really like the color of the green cardstock, but it's the only one they had in the shop.


For the cups I used the same cardstock to cover the cups. Then I used crepe paper for the masks and added googly eyes and a mouth. In the end I tied little balls on a string and poked the string through the bottom.


Now the only thing that's left to create is the Birthday card. Ah well, and laminate the bookmarks of course.


Love
Ela

Tuesday, 2 September 2014

Ninja Birthday

Hey Crafters,

this week-end, my daughter's first love has his 8th birthday and celebrating a Ninja Turtle party.

I offered his Mom some help and created the goodie bags:


I stuck to what I knew, changing my old concept (I created this before as aliens and angry birds) up a bit. I used crepe paper for the masks. They are glued to the front and knotted on the back. The nouthes are drawn on with edding markers. 

I am not entirely happy, I think it doesn't look enough like turles, but I don't have an idea how to improve them. 
 
By the way, the bear was made a ninja too by my kids.


As I just realized, when I tried to link them: I never posted my alien goodie bags, so here they are:


Have a great day
Ela

Thursday, 28 August 2014

Monster Birthday Wishes

Hello Crafters,

it's Monster time! We're celebrating another birthday on Saturday, and the boy is having a Monster Party - perfect occasion to pull out my Monster Mash stamp set.


I created the front panel ages ago with my gelli plate and acrylic paint. I adhered it to my top folding card base and cut a whole through both layers. The Monster is water colored, fuzzy cut and adhered to the inside with foam tape. For the speech bubble I used my fiskars shape cutter to cut out most of an oval and hand cut the rest. For the envelop I used the same stencil, sponging the flap with distress inks. 

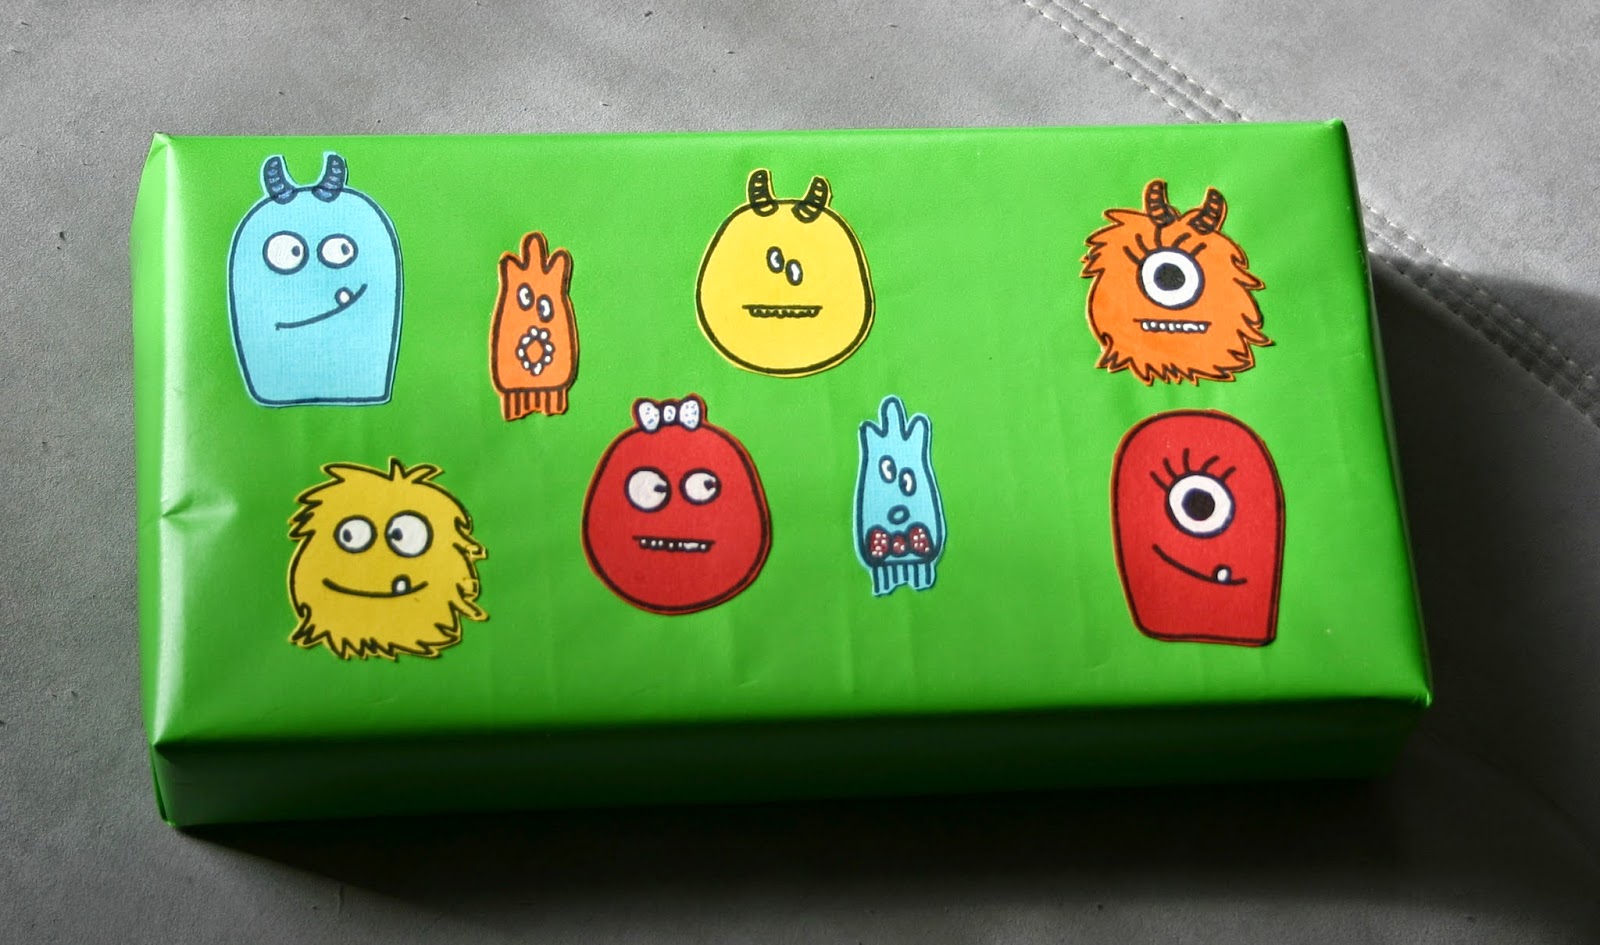
I also stamped and cut a few more monsters from colored cardstock to embellish the gift wrapping:


Have a monster day

Ela


Challenges: Seize the Birthday

Sunday, 10 August 2014

Colorful clay

Hello Everyone,

Hope you are enjoying summer as much as we do.

For a friend's birthday, my girls and I painted more clay flower pots, to create a garden decoration. We used acrylic paint and outdoor spray varnish to seal the color. These pots are not glued together, but will be lined up on a bamboo stick. In the top pot she can plant a flower of course.

I do hope she likes it, it was heaps of fun and I can imagine doing more of these.

Actually she wished for her birthday party invitations to be handmade by me, because she lacks the time at the moment. She wanted a design I had already done before, nothing new, so I spent several days mass producing peacock feathers (30 invitations!) with my inktense pencils. Actually, I made a few more for myself, while I was at it.

I didn't want to paint all the envelops too, so I got colored envelops in matching colors, and packed it all in a (store bought) gift box. The box is just her style, I think she'll love it and the colors fit quite well with the feathers too.

As she wanted to print directly on the card base, I gave her the cardstock to print on last week and threw in a tape runner so she can stick the panels on the card base. It all fits in the box quite nicely, there would even be space for the cardstock. But I thought it would be easier to print on full sheets and cut and score them afterwards.


Happy summer
Ela