Showing posts with label miscellaneous greetings. Show all posts

Friday, 1 January 2021

Happy New Year 2021

 Hello Crafters, 

I'd like to wish you all a happy and above all healthy new year. I sure hope 2021 will turn out better than 2020 did. 


I don't send out extra New Year's cards myself, since December is always a busy time. But my friend does and we have the (still new) tradition of me giving her a set of new year's cards for Christmas. 

This year I wanted to make an early start, while she still hadn't given me the latest count. So I decided on 25, assembly-line style, since the year before she had needed 20 cards.

First, I stamped each of the balloons individually with the main colour. I left the stamp in place in my stamping platform and stamped each balloon again, with a darker shade blended around the edge to achieve the shading. Then I set out to die-cut all the individual numbers and stacked them up for more dimension. After they were all ready, I blended on some yellow ink from the bottom and adhered them to the card base, using a straight edge to get them straight.

Next, I stamped, heat embossed and cut out all the sentiment strips. They read "healthy new year" in German. Before I adhered them, I loosely doodled in the balloon strings. 

Normally I would have put glossy accents on all of the balloons, but since they were so many I didn't do that this time. 


I was very glad to finish these cards in mid-November because I knew that would be the most involved Christmas present this year. 300 die-cuts, I must be losing it... 

Stay safe and healthy and a happy new year!

Ela


Friday, 20 November 2020

Rainbow street

Hello friends, 

how is life treating you? 

This is another card that I already made last summer. My daughters had a huge Playmobil dollhouse, that I meant to sort out when we moved 2 years ago. At that time, they were neither ready to let it go, nor to have it in their rooms, because it is huge. 

So we kept it in the hall, for the toddlers in the family when they came visiting. But it still was in the way, so last summer I decided to give it to my niece's children, who are still young enough to get a full childhood's worth of joy out of it. 

She lives about 5 hours drive away, and usually, we see each other at least once a year, but this summer I didn't know if we could go visiting, so I decided to mail it. 

Since I needed a card to go with it, I decided on houses as the general theme. I die cut the houses from white card stock and coloured them in rainbow colours with my alcohol markers. Then I grounded them on a dry embossed panel which I popped up from the card base. I also added just very faint blue ink blending to the card base, to set off the white panel and added a black sentiment strip. 


I added a vellum envelope because I love them and bright and colourful cards usually look great through the vellum. The downside is that I don't mail vellum envelopes, I use them either for hand-delivered cards or cards that go in a parcel. 


Have a lovely weekend
Ela


Friday, 13 November 2020

Just a note

 Hello Crafters, 

how is life treating you? 

My daughters' school is now back to hybrid schooling, meaning that only part of the class will be at school, while the other half will work from home. 

While this is putting a bit more stress into my working hours, I am glad to endure this for the sake of the reduced infection risk. It is no big price to pay, considering that my girls are already teenagers. They mostly do their school work with merely the occasional nudge from me. 

Today's card I created back during the first Corona lockdown. I had a small gift for a friend, a stamp set that I thought she might like, and since I am impatient, I decided to send it by mail. 


I kept the card very simple and just stencilled a few wildflowers onto my card panel. Since I needed to use a rather bleak envelope, I stamped this huge succulent to the front and added some shading with alcohol markers. 


Please, stay safe wherever you are. 
Ela

Wednesday, 8 January 2020

Card for a Christening

Hi Crafters, 

today, I'd like to show you a very simple card, I created for a Christening in the family a while back. This baby by the way, is none of my nieces, he's my great-nephew - yes, my sister is a granny. Am I getting old?

I was running a bit late, and we still had travel arrangements to make, so I kept it very simple, with little patterned paper banners. I don't think it needs much explanation, it's pretty straight forward...


By the way, the card matched our gift.

The parents only asked for money, but I wanted to at least present that in a special way. So I created a hot air balloon and decorated it with banners from the same papers. It can be hung up in the baby's room just as it is, or even be turned into an actual lamp (which is what the parents did). And the raccoon was holding the envelope.

Should have taken the picture from the other side, that looked better, but it's too late for that now... 


Lots of Love
Ela


Thursday, 2 January 2020

Happy new year 2020

Hello Crafters, 

and a very happy and healthy new year to all of you. 

I hope you all had a good start into 2020. 


These cards I made for my friend, who likes to sent out separate new years cards. It was her Christmas present and I made 21 of them. She needed 20, so I created one more to account for last minute adjustments. normally I would have gone for 25 or 30, thinking she could use them later, but since the year is on them, she won't be able to use them next year, so I made only one extra. 

I used liquid water colours for the vibrant backgrounds. Most of them in rainbow colours, some I did reds and yellows or blues and greens. Then I stamped the happy new year sentiment across the panels, adhered the die cut numbers and stamped the sentiment again, over the numbers. To do this, a stamping platform comes in really handy, to get the placement perfect. 

Last I adhered the finished panels to a white card base with foam tape.

I meant to take pictures of them all, but I completely forgot, so I apologise for the poor picture quality. 

But I have to say it sure was fun to receive one of them in the  mail. 

All the best to you
Ela


Challenges:
Simone says Stamp: Something new
Always Fun Challenges: #143 New Year 2020

Monday, 18 November 2019

But first, Coffee

Hi Crafters, 

I hope you are doing fine. 

Today, I have a coffee card for you. I wanted to try out a stamp set I picked up at a dutch chain store nearby. It was very cheap, so I wasn't sure about the quality. Also I wanted to play with my new Distress Oxides. 

When they came out I decided not to buy them, because I have a tendency to reeeaaally needing every colouring medium I see. I stayed strong, until a few weeks ago, when I decided to try a few colours, that I don't have in the regular distress inks. No duplicates. 

I shouldn't have, now I want them all. 

Since I have quite a few of the bright distress ink pads, my selection of Oxides is very muted, and I really wish I had bought some brights too. 


To balance out the blended strip, I wanted the cups to be bright and shiny, so I went for a rainbowish colour scheme with the cups. 

I am not entirely sure how I feel about this card, except for the sentiment. That is very much how I feel right now, since I barely slept last night.


Lots of Love
Ela


Challenges:
CAS(E) this Sketch: #348
Addicted to Stamps and More: #367 Make your Mark


Saturday, 26 October 2019

Another Butterfly card

Hello Crafters,

today it's my daughter's turn again. She was inspired by the water coloured butterfly I created a while ago and wanted to use the same stamp.  But then she liked this smaller butterfly better.

 
She used alcohol markers to colour it in shades of lavender and purple. I love the blending she achieved. She picked a grey card base and a white panel and embossed the panel with a 3D embossing folder. Then she added a sentiment die cut, which she also coloured with a lavender gradient. 

I love it, when my girls are creative with me, it's always a relaxed time between us, which isn't always the case. 13 being the age, when parents start to get (even more) strange and embarrassing... 


Wishing you all a nice day
Ela


Challemges:
AAA Cards: #152 Maxi white space +geometric


Wednesday, 16 October 2019

Quick flower wreath with Love

Hello Crafters,

I hope you're all well. 

I am still benefitting from the happiness and motivation I took from the crafty goodness at the community centre the other day.

I went back to my craft space right the next day and created two more cards. Here is the first of them: 


I stamped the wreath and sentiment in black ink and very losely coloured it with my ZIG markers, trying not to stay in the lines and not to be too exact. I found that incredibly hard. There nust be a perfectionist hiding in me somewhere. He (or she) was cringing all the time.

I trimmed down the panel so the grey card base would show on either side and added stitching to the card base with a border die. As a last step, I popped up the panel with foam adhesive.

I love how this card turned out, and it was so quick to make, I think I'll make a whole bunch of them, in different colour schemes and sentiments, just to have on hand. 


Lot of love
Ela


Challenges:
Day of the month Card Club: #8 World Cardmaking Day

Sunday, 13 October 2019

Hello, how are you?

Hi Crafters, 

how have you been?

I am very well, I have finally found some like minded crafters in my area, to create with about once a month. That's something that I would always have liked, but there never seemed to be anyone nearby, but in my new town it's finally come true. 

A friend of mine (who normally avoids crafting whenever she can) took me along to a bible art journaling workshop, that happens about once a month at the local community centre. 

We were a group of about 10 women, the materials provided were wonderful and the atmosphere was incredibly relaxed and cordial. After I almost chickened out at the last minute, I was really amazed how much I enjoyed it. 

And it did give me back quite some inspiration. After returning from 3 hours of craftiness, I actually sat down and created a very clean and simple "welcome home" card for my lovely landlady, who was about to return from an extended holiday.

Unfortunately I didn't have the matching sentiment, to say Welcome home, or even just Welcome, so I made it a "Hello, how are you" instead. 


As you can see, it's very simple. I just blended on some light green and blue and added the die cuts and a few sequins. Then I added the panel to a light grey card base with some foam adhesive.

But I like the simplicity of it. 


Have a beautiful day
Ela


Challenges:
Just add Ink: #487 Just add "H" (Houses and Hello)

Addicted to Stamps and More: #362 Make your Mark
 

Thursday, 10 October 2019

Flowery Greetings


Hello Crafters, 

how have you been keeping? Sadly my holiday is already over and the workload is already getting on my nerves. But at least I am still in the mood for lots of crafting, so I have a few cards in line for you. Unfortunately, now my household desperately needs my attention on the week-end. Where can I apply for a 48-hour-day?

Here is the 2nd card I created with the colouring book page a few says ago. I used pretty much the same concept as before, but changed it up a bit. . 


Since I had cut the flower for the other card from this piece, I didn't have a full card size anymore, so I cut it narrow and adhered it to a black card base. I have a set of cheap metallic watercolours I used a few days ago, to create some backgrounds (that I still need to use). These were still sitting on my desk and I noticed that the blue colour is a pretty good match to the teal I used in my colouring book. So I added to very thin strips of shimmery metallic paper along the edges. 

I also wanted to use a vellum circle this time, but that got a bit lost, so I cut a very narrow ring from the same metallic water coloured paper and adhered it to the vellum circle. That also gave me a spot to hide the adhesive. 

In the end I had to add some sequins, because there was a smeared spot on my paper. 

I am still not sure, which of of them I like better  - as usual. Here they are, side by side:


Have a brilliant day
Ela


Challenges:
Addicted to Stamps and More: #362 make your mark


Sunday, 6 October 2019

Greetings with more colouring book pages

Hello Everyone, 

how did you spend the world card making day yesterday? 

Turned our, for me it wasn't the best of days. I managed to almost kill myself on a clothes horse - yes, don't ask... Now my nose looks, like someone hit it with Avada Kedavra. I don't remember any green light though. So maybe I'm not "the Mom who lived". I also hope it won't scar.

On top of that, my daughters seemed to want to get on my nerves last night, thus ruining my crafty mood. So in the end I went to bed frustrated and annoyed, with only one card created, only to find I couldn't sleep at all.

Well, enough complaining, today, was a much better day. I created only one card, but a bunch of matching envelopes to cards I had created earlier.

So here's yesterday's card:


When unpacking another box from the move, I found this sheet from a colouring book. I had planned to finish it and then forgot about it. Now I decided I liked it the way it is, only partly coloured and I would use it for another card or two. It was just the right size for about two card fronts.

So I cut it down and adhered it to a grey card base, with a bit of a frame. Then I simply added the sentiment circle. And by simple I mean I fiddled and tried for ages, white, grey, black, vellum, teal gradient? In the end I stuck with white, but the circle seemed too plain. Then I remembered a Sketch I had seen and decided to use it.
I cut out one of the blue flowers from the edge of the leftover paper and adhered it to the bigger circle. Since I didn't like the flower - aka the smaller circle - near the G, I simply turned the sketch around. Even though the inspirational image has a dragon fly instead of butterflies, I think my card actually matches the image as well. That's accidental though. 

I considered using the rest of the paper to dress up the envelope, but I really wanted to use it for another card. Instead I picked a stamp with a similarly whimsical flower and coloured it with the same ZIG marker I had used for the paper. It turned out a bit darker, because I had to work hard to achieve any gradient. My store bought envelopes don't take water well at all. It also turned out glittery, because I used a brush that I had previously used with metallic watercolour and obviously not cleaned out well.

A happy accident, because it gave me the idea for today's card, using up the rest of that paper. But I haven't taken a daylight picture yet, so I'll post that another day. 

Now, have a good start into the new week. 
Love
Ela


Challenges:
Fusion Card Challenge: Dragonfly

Friday, 20 September 2019

3rd time aunt - cards and gifts

Hey Crafters, 

today is a happy day, my third niece was born last night, just before 11 pm. Only one day after grandpa's Birthday and an easy date to remember. Both, mother and child are healthy and Happy.

The news of my sister-in-law in hospital left me frantically busy, because - guess what - with a 10 month delivery time, I had neither the gift nor the card completely ready. All planned out though, but not completed. 

So, first things first, here is the card. 


I wanted something clean an simple and had that idea of a landscape card with the name across it in the lower third and some embossing paste stencilling in the background. Turned out, the name is too short, it just didn't fill enough space, with the only large letter cutting dies I own. So I changed the plan to portrait, with otherwise much the same concept. To make the letters shine, I ink blended an ombre effect. I probably should have gone a bit darker near the lower edge.

The changed format left way too much empty space at the top of the card, so I needed a cute image to fill it.

Checking my options I decided on the adorable Mama and Baby bear. I coloured them with alcohol markers, which I hadn't done in quite a while. I almost gave up, it just didn't seem to work, but in the end I persevered and I think the final result is okay. 

I added a black sentiment strip that says "Hallo", to spell out "Hallo Luise" and to tie in the black outlines of the image. I originally wanted to spell "Welcome", but Hello was the best I could find in my stash. 

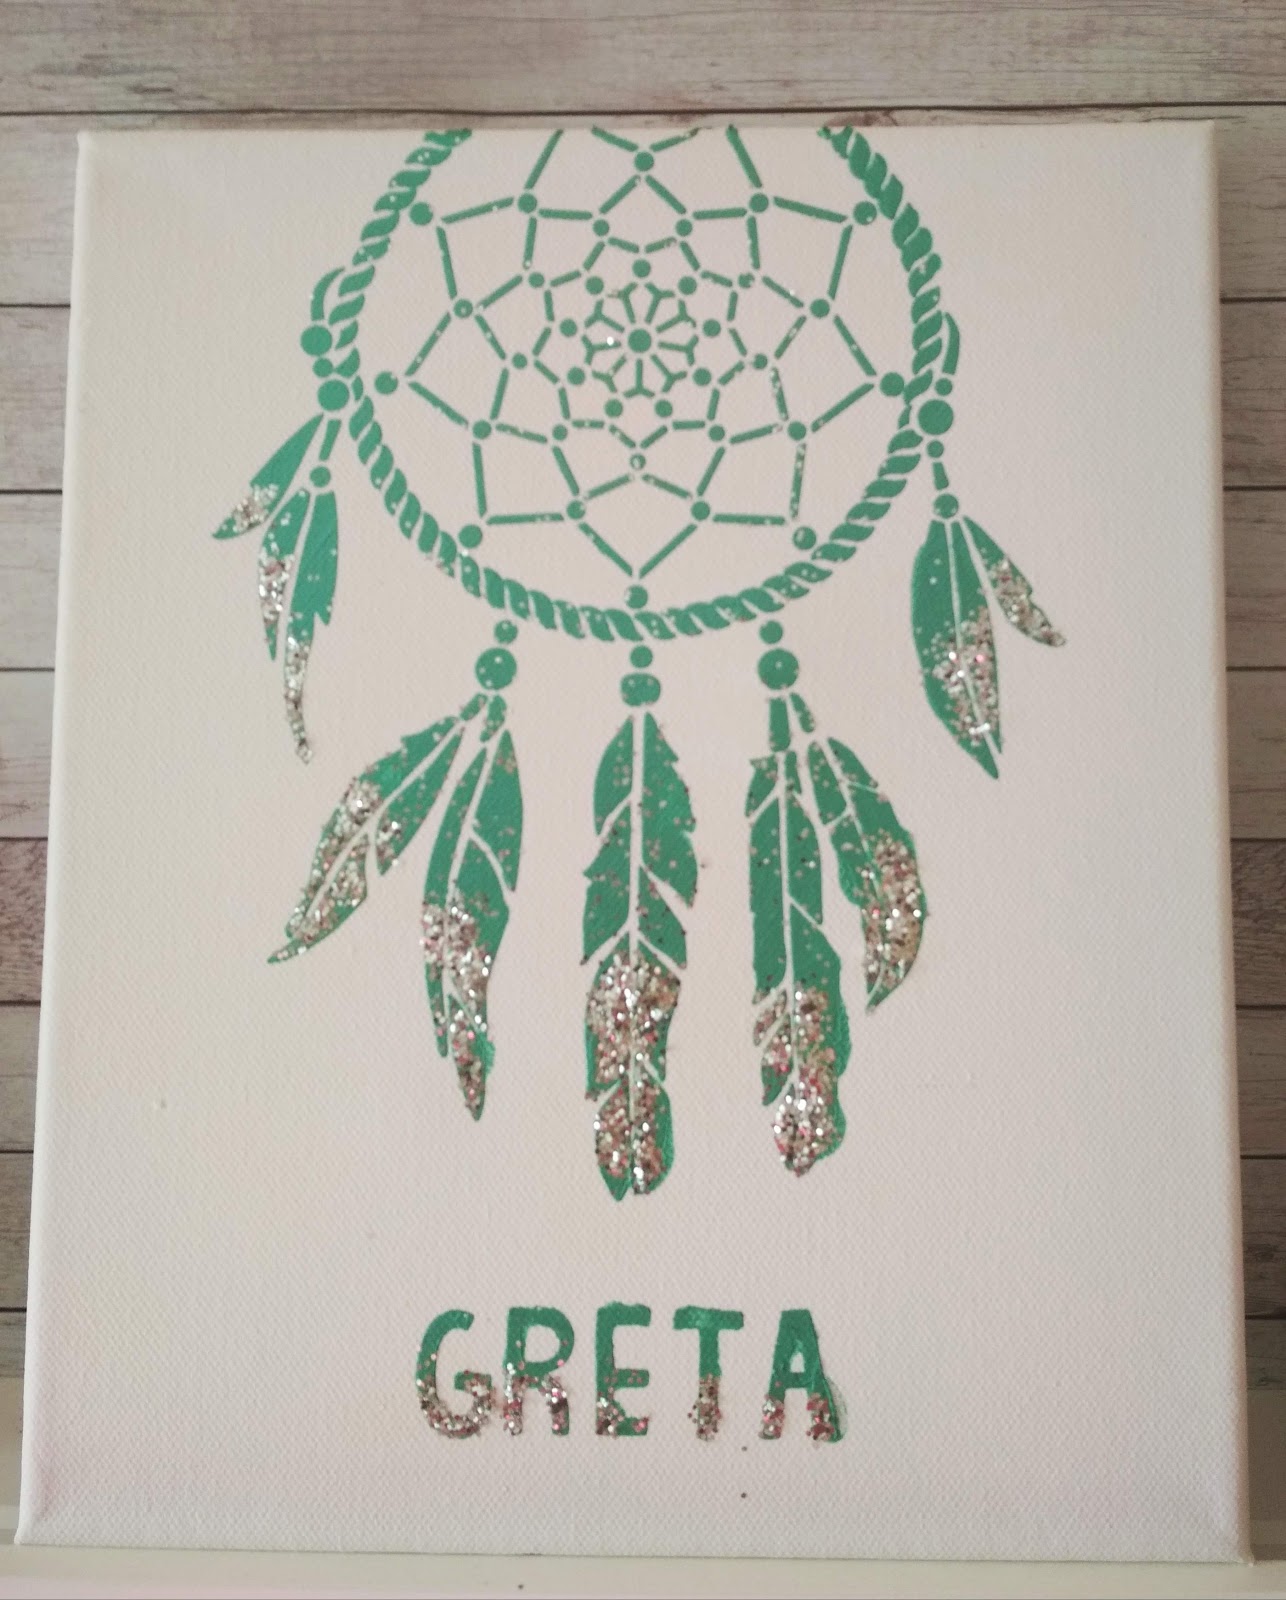
While the embossing paste still dried, I cleared up my stencil and happened to glance at a larger stencil in my stash, that I used on some T-Shirts for my daughters. That sparked the idea, to create a canvas as well. I happened to have 2 canvases of the same size, so I created one for the Baby and one for the older sister as well. 
I actually would have liked to do an ombre here as well, but I didn't have matching colours, so I glittered it up instead.


And finally, here is my first ever diaper cake. I had the ingredients lying around for ages, except for the diapers, which I only bought yesterday. 


Well, that's it from me, I need to get to work, it's going to be a busy day, especially since the happy parents are already home and  ready for visitors. 


Lots of love
Auntie Ela


Challenges:
AAA Cards: #149 - Up to One Third
CAS(E) this Sketch: #340  (it's a bit loose, I hope it still counts) 


Sunday, 1 September 2019

Shaker for you

Hello Crafters, 


how are you keeping?

Today I'd like to show you a mother daughter collaboration card.

I created the sunburst panel when I received my new blending brushes (the cheap option) and wanted to try them out. I used a stencil to blend on reds yellows and oranges. Strictly speaking a sun burst probably has straight rays, but with the fiery colours I think it simply screams sun...


I didn't use the panel immediately when I was done, so my girl picked it up and crated a shaker to  go with it. She kept the sequins in matching colours and the sentiment very versatile. It reads "for you".

I especially like that she kept the centre visible, I would probably have covered it up with an image. 

Have a sunny day
Ela


Challenges:
Addicted to Stamps and More: #356 Anything goes
Simon says Stamp: Anything goes


Saturday, 14 October 2017

Challenge up your life: Challenge #77 Arrows

Hello Crafters,

If you have been reading my blog, you might  have noticed, that I hardly ever use patterned paper. Mind you, I love patterned paper, I just can't let go of it. And I am not good at using it on cards, I never seem to know what to do and where to place it. For today's card, I actually did! So it's a double challenge for me because this card is for another challenge at


This time, we are encouraging you to create a card with arrows:


Challenge #77 Arrows


I actually found this one rather challenging indeed. I knew I wanted to use my AladinE StampO Arrow stamp set, because these are pretty much the only arrows I own. And besides I bought them years ago, because they were rather inexpensive, and hardly used them since.


So I started out stamping a panel of different arrows in green ink, but then I was a bit lost as to what else to do. I decided I wanted them to pop out more, so I outlined them with a grey alcohol markers and a blender, creating a shadow.

After that I spent some time pushing it around on a black and grey card base, feeling a bit lost some more, before I remembered that I have seem some really neat layering with several smaller layers lately. Mostly on scrapbook pages, but I decided: I can do that too! So I die cut a stitched panel from green card stock and vellum and from my arrow panel as well and tried to arrange those, but it just wasn't working for me. So I pulled out a leftover piece of that brightly striped patterned paper. I love that one, it's so cheerful. And I have several sheets, so I can actually use it. With a panel of that paper, it finally worked for me, but I wanted a bit extra for the card base, so I pulled out stencil and some clear embossing paste to create a subtle texture. 

I arranged the panels and added a black die cut and a white embossed sentiment strip. It means "Hello how are you?" in German. 

I only recently invested in quite a few German sentiment dies and I really love them. I generally tend towards German sentiments, as I am making cards for friends and family, who mostly don't share my love for the English language.

I adhered the die cut to the black strip, which was in turn adhered with foam tape. So the Hello floating over the panel. I also added a, arrow paper clip, to tie in the arrow motto some more.

For the envelope, I used the same patterned paper and my envelope punch board.


So, now it's up to you, I hope you join us!
Ela


Saturday, 2 September 2017

Challenge up your life: Challenge #74 Moodboard

Hello Crafters,

it's challenge time again, so please check out


This time we have a colour / moodboard challenge for you. Isn't the image adorable? I love the fog between the trees.
 

Challenge #74 Moodboard


However, this was a real challenge for me. I generally find colour challenges difficult and with these colours, beautiful as they are, even more so. 

In the end, I decided to stick very close to the image and try my masking and ink blending skills. They can do with quite a bit of practise. I used worn lipstick, shaded lilac, dusty concord and black soot to create the circle area and stamped some wildflower silhouettes over the circle.

Originally, my intention was to keep it very simple, with just a sentiment, but when I had the panel finished, I felt it needed a bit more. So I chose a purple card base, which was just a touch to pale for my taste, so I blended a bit of black soot over the whole card front. Not much, just a tiny bit. Then I cut down the panel, rounded the corners and used a border punch to create the top edge. Is there a name to that kind of border?


I did the same with a piece of vellum and adhered both panels on top of each other at an angle. As an embellishment I added a pink paper clip arrow. 
For the sentiment, I punched two small tags from vellum and the same purple card stock (darkened again with black soot) and chose a small German sentiment, which I heat embossed in white onto the vellum. 


Now it's your turn, I'm curious what you will create.
Ela


Challenges:
Simon says Stamp: Anything goes

Tuesday, 29 August 2017

No line water colouring

Hello Everyone, 

I hope you are having a good day. 

Today I have a watercolour card for you. I practiced my  no line colouring.


I created the panel just for practicing, and I think the right flower looks a bit odd. But I still wanted to use the image on a card. So after I had the panel lying around for weeks, I decided to tear the edges and stick it onto a plain grey card base. I added the beautiful sentiment, which means "for you" and a vellum envelope. 

Very simple, but I like how it turned out. 

And something entirely different: 
My Pandas actually won the Panda-Challenge, I am sooo happy!


Have a great day!
Ela


Challenges: 
Creative Friday: #186 No-line colouring


Saturday, 5 August 2017

Challenge up your life: Challenge #72 Circles

Hello Crafters,

it's time for another challenge at


This week, we are challenging you to use circles on your cards or layouts.


Challenge #72 Circles


I started out, with an entirely different idea. I meant to use an embossing folder with circles, a wide strip of a rainbow gradient I still had lying around and a circle focal point with some kind of image. 
 
I went through my stash and picked a humming bird from WPlus9. I coloured it in blue, green and purple, but then I got stuck... I couldn't make my elements work for me... 

I decided to drop the rainbow and created a whole bunch of circles, I coloured them with alcohol markers in matching colours (blue, lilac, purple, green and grey) and arranged them on a white card base. But it still didn't work, so I dropped the bird as well. 

Now I needed a new focal point. But luckily I  had just received a new sentiment stamp set with the most beautiful scripty sentiments. It's actually an add-on set meant to go inside a circle element, but I didn't get the main set. I just loved the sentiments, and I think they work just as well without a circle.


I stamped the sentiments on a white circle and matted it on a slightly larger grey circle, which was adhered to the card front with foam tape. The sentiments reads "kind regards", but in German that is less formal than in English.

Now, I hope you'll join us in using circles on your projects.

Lots of love
Ela

Wednesday, 2 August 2017

Block stamping with water colours

Hey Crafters, 

today I'd like to show you three cards, inspired by Jennifer McGuire. 

She did a whole buch of amazing cards with block stamping and water colours a while ago. I'll not explain how I created them, if you're interested in the technique, please check out Jennifer's video.

This technique is always fun, so when my daughter wanted to craft with me the other day, we went for it. 


I especially liked Jennifer's cards with the torn edges, so this is how my cards turned out. By the way, I didn't add stitching, because my sewing skills are non existant... Beside I've lost the power cord for my sewing machine. Don't ask me how.


Which one do you prefer?


Lots of love
Ela