Showing posts with label 4kids. Show all posts

Saturday, 24 October 2020

4th Birthday shaker squirrel

Hello Crafters, 

I hope you are all still staying safe. 

2 days ago, one of our family youngsters turned 4 and we gave him the board game 'Nuss voraus', which roughly translates to 'nut ahead'. I couldn't find it in English, so I am not sure if it's actually called that. 

It is about a squirrel, so I absolutely wanted to use my only squirrel stamp, which I've never used before. Besides, I wanted to use the number '4' as a design element and I also had the vague idea, that a shaker card would be fun. 

With these two and a half elements as a starting point, I water coloured the squirrel with my ZIG markers and fuzzy cut him out. 

After that, I struggled a bit. First I thought I'd use a row of numbers, like I did for my niece's birthday last year and place the squirrel on top of the line. But somehow that didn't appeal to me as much for this card. So I went ahead and cut out a bunch of numbers to cover the whole background. I think of this as faux dry embossing, since it adds white on white texture without being in-your-face.


I liked that, but now my squirrel had nothing to stand and there was space to fill therefore I decided to go with the shaker circle die, with bright green and blue sequins inside. 
I wanted one of the numbers to stand out from the rest, so I blended some blue and green Oxide ink on one of them and on the circle die as well. I thought these colours would compliment my squirrel's c. 


When I had adhered it all down, I felt the colours were too muted, I wanted them glossy and bright, so I added liberal amounts of glossy accents to the 4 and the circle, but not the Happy Birthday. I didn't trust myself with the intricate letters. 

A bit of a stupid idea, since we were due to visit only a few hours later, so I had to place the finished card over the heating to make it dry faster. It turned out okay, luckily. 

In the end, I am not sure if the squirrel really fits in with the rest of the design, but I used him anyway since that was the whole point of it. I grounded him on the letter H.

Since my great-nephew will also be 4 next month, we'll give him the same game, and I'll have another chance to make a card with this squirrel. I am thinking fall coloured tiny leaves in a square shaker, maybe...

Sadly, 4-year-olds don't really appreciate Birthday cards, but at least the parents do. Cardmaker's children are probably the exception, my girls always appreciated handmade cards, because they knew how much love went into them. I bet it is/was the same for your children if you're a cardmaker. 

That's it for today, stay safe wherever you are

Ela

Friday, 20 September 2019

3rd time aunt - cards and gifts

Hey Crafters, 

today is a happy day, my third niece was born last night, just before 11 pm. Only one day after grandpa's Birthday and an easy date to remember. Both, mother and child are healthy and Happy.

The news of my sister-in-law in hospital left me frantically busy, because - guess what - with a 10 month delivery time, I had neither the gift nor the card completely ready. All planned out though, but not completed. 

So, first things first, here is the card. 


I wanted something clean an simple and had that idea of a landscape card with the name across it in the lower third and some embossing paste stencilling in the background. Turned out, the name is too short, it just didn't fill enough space, with the only large letter cutting dies I own. So I changed the plan to portrait, with otherwise much the same concept. To make the letters shine, I ink blended an ombre effect. I probably should have gone a bit darker near the lower edge.

The changed format left way too much empty space at the top of the card, so I needed a cute image to fill it.

Checking my options I decided on the adorable Mama and Baby bear. I coloured them with alcohol markers, which I hadn't done in quite a while. I almost gave up, it just didn't seem to work, but in the end I persevered and I think the final result is okay. 

I added a black sentiment strip that says "Hallo", to spell out "Hallo Luise" and to tie in the black outlines of the image. I originally wanted to spell "Welcome", but Hello was the best I could find in my stash. 

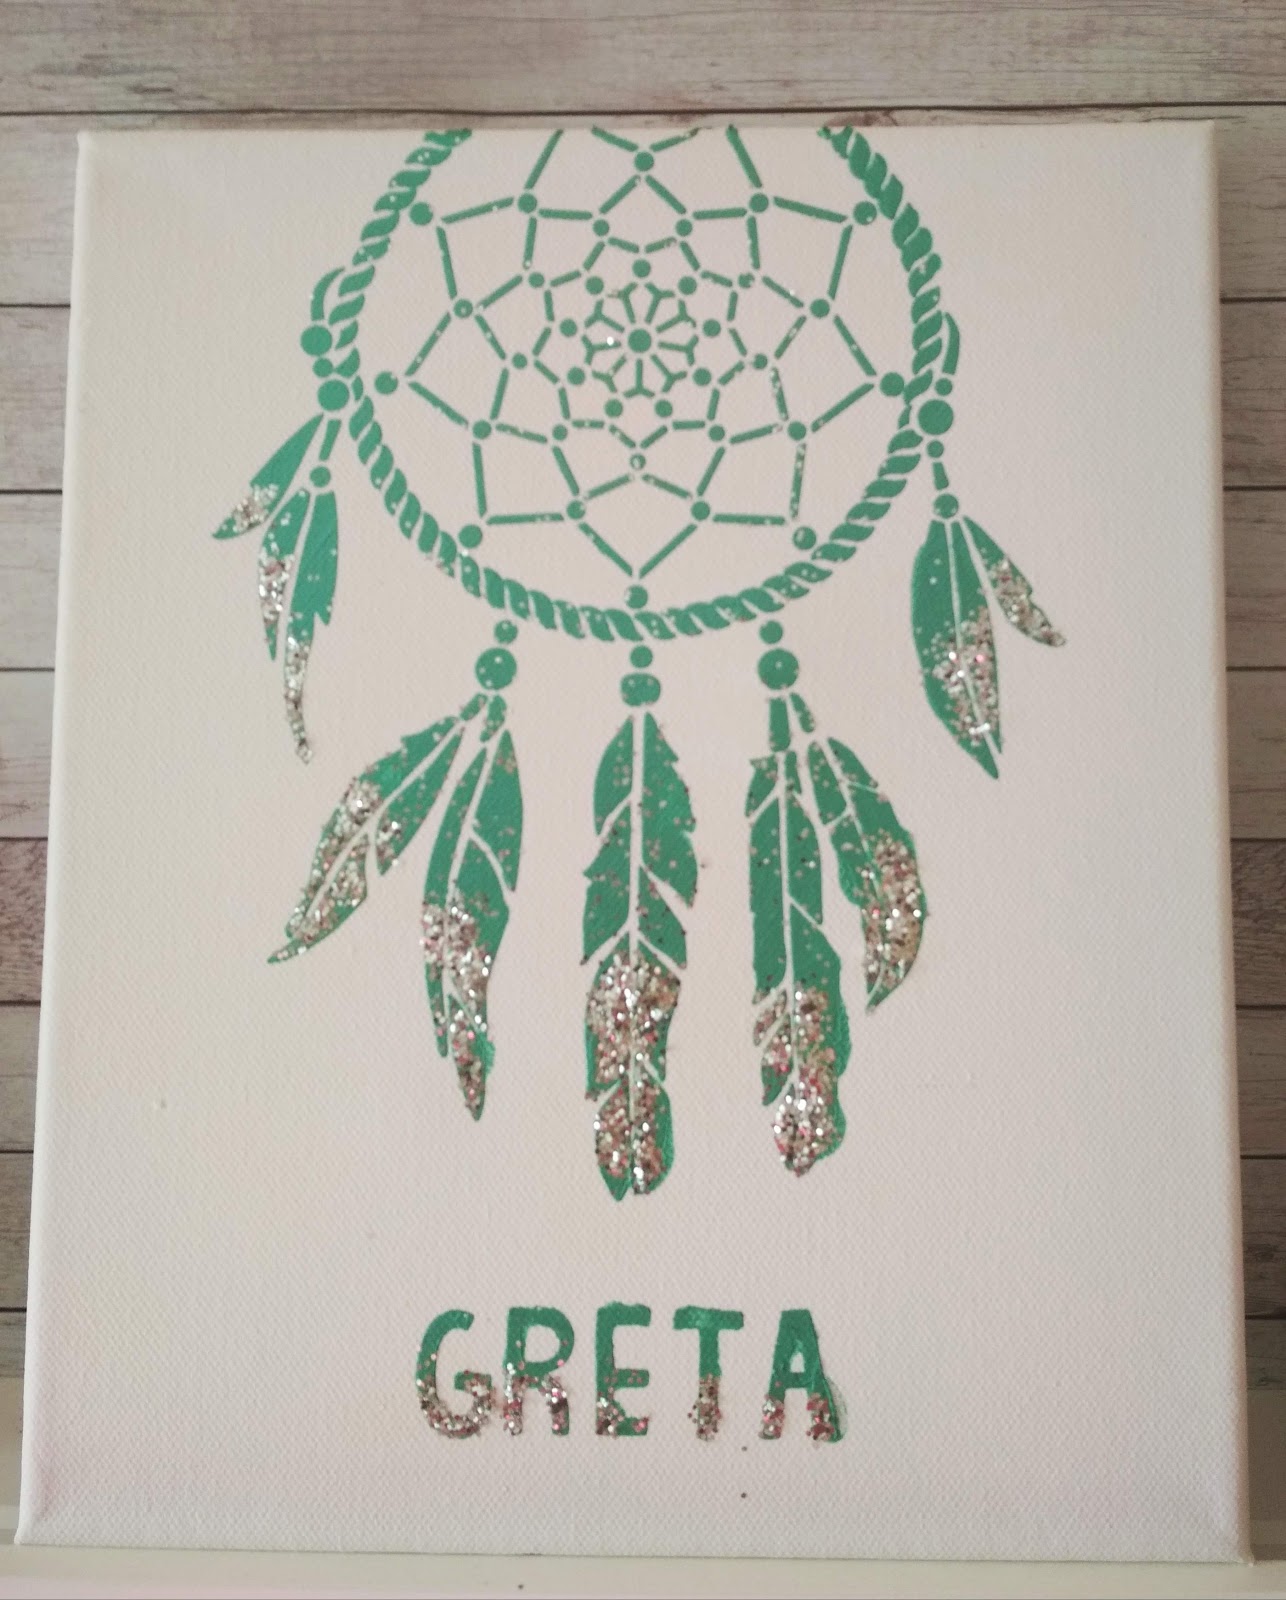
While the embossing paste still dried, I cleared up my stencil and happened to glance at a larger stencil in my stash, that I used on some T-Shirts for my daughters. That sparked the idea, to create a canvas as well. I happened to have 2 canvases of the same size, so I created one for the Baby and one for the older sister as well. 
I actually would have liked to do an ombre here as well, but I didn't have matching colours, so I glittered it up instead.


And finally, here is my first ever diaper cake. I had the ingredients lying around for ages, except for the diapers, which I only bought yesterday. 


Well, that's it from me, I need to get to work, it's going to be a busy day, especially since the happy parents are already home and  ready for visitors. 


Lots of love
Auntie Ela


Challenges:
AAA Cards: #149 - Up to One Third
CAS(E) this Sketch: #340  (it's a bit loose, I hope it still counts) 


Tuesday, 31 October 2017

Happy Halloween

Hi Crafters,

are you ready for tonight? 

I thought this Halloween would be especially cool for us, since it is a bank holiday in Germany this year. But actually this has caused a lot of families, to make other Halloween plans. Therefore our own party will be a lot smaller than it was in the past years, as so many kids are not coming. 

But we decided to have fun anyway. So, here is out invitation this year.


Since I don't write Halloween cards to friends (Halloween is not that kind of holiday in Germany), I always try to refrain from buying any Halloween stamp sets. With the result that I have to make do without them for the Halloween invitations. 

This year I was feeling particularly uncreative, until I came up with the idea to use creepy nighttime trees as a backdrop. From there it all was so easy. 

I didn't have any light purple card stock, so I printed the invitations on white card stock, making sure that I got the spacing just right, so I could cut two card bases from each sheet of paper. Then I sponged on some lilac ink around the edges. I also sponged some additional card stock strips with the same ink, to back the sentiment strips with later on.

I embossed black card panels with a tree silhouette embossing folder and enhanced the pattern with white pigment ink. Then I adhered three sets of differently sized googly eyes. 

For the sentiment I picked a creepy-cute spider's web font and printed "invitation" on orange card stock and cut it to uneven strips. Those I backed with the extra lilac card strips I had prepared. 

Last I assembled it all and printed the names on the envelopes with the same font.

Now, go ahead and get creepy!
Ela


Challenges: 

Always Fun Stamping: #30 Halloween
Night Shift Stamping: Bäume 
Stempelküche: #81 des Nachts/Night Time
Simon says stamp: Anything goes
 Shopping our Stash: #327 Halloween


Wednesday, 3 February 2016

The great book of elves

Hi again,

Time to show you something else that kept me busy during the past weeks.
After seeing my Halloween grimoires, my friend, who is a teacher, asked me to help her create a magic fairy book, as a prop for a school musical. So I spent quite a few busy evenings, collecting ideas and developing a plan. And then many more actually creating it.

And here it is, the great book of elves:


As a basis I got an old used book, the largest I could find. Then I cut the oval in the front and about a third of the pages, to create the recess for my little fairy. If you ever try to re-create something similar, I can only advise you to use straight lines, the oval was so tough and it didn’t get as even as I had hoped…
After the cutting was finished, I covered the book with mod podge and a single layer of crumpled paper towel, to create some structure. Then I added some more structure with embossing paste and a floral stencil. I had to do that twice, the first layer wasn’t quite enough. I also adhered the die cut fun foam letters to the book.


Then I painted it all white (several layers) and brushed on green and pink, because that was the colour scheme my friend wanted. But that really didn’t look good at all, so I painted it white again. After this layer of white, the green and pink still shone through a little, but I thought that looked rather interesting, almost pearlescent. So I kept it like that and brushed on gold to bring out the structure. But that wasn't quite strong enough for the letters. Therefore I used a gold Edding to trace the letters, corners and stripes. That made them stand out much better.

I placed a green water colour background behind the window and glued the pages of the window together (mod podge again). Then I adhered some leaves, flowers, a small piece of bark and the fairy in the opening.


I also added three strings of pearls to the outside spine, to make it more magical. To do so, I fixed the strings to an elastic band with wire, pulled the elastic through the spine and then fixed the other side in the same way, under a bit of tension. Now the elastic is pulling in the string and wire, keeping them safely hidden.


After the outside was completed, I turned to the inside. As the base was a glossy paged cookery book, I really wanted to cover the pages with something.
So for a start I removed quite a few pages, to make the book less heavy, thinking of the poor child who will have to hold it up on stage. Then I chose aged looking printer paper and printed a few fairy stories on it in a font I liked, but very lightly so the print was barely visible. Then I traced all the letters with a black calligraphy fountain pen, to make it look handwritten. Next time I’d definitely just print it in black and be done with it. I don't even want to know how many hours that cost me.

Next step was to cut off all the remaining pages, leaving only a narrow strip of each, on which I adhered the new pages, covering the strip from both sides. That was much more difficult than I thought, which is why the pages don’t look as neatly as I had hoped. But after all the work I just can’t start over… So that’s deliberate, definitely…. ;) 


By now, my friend already took the book back to school to show her class, and they were all excited...

Now, have a magical day
Ela

Tuesday, 26 January 2016

Harry Potter Halloween Party

Hi Crafters,

maybe you still remember, that I promised to show my Harry Potter Halloween party decorations, as soon as my friend would send me the pictures she took. Well, I still don't have them, she's always very busy, so I decided to go ahead with the ones I took. I did not take pictures of everything, because I had planned to take them when it was all finished, but food preparations took so much longer, that the "all finished status" was reached about one hour into the party... So no time to take pictures. 

But I checked my mobile and my camera for what I had and here it is.... Sorry that some of the photos are of rather bad quality, they were never meant to go online.

First things first: the invitation card and envelope. I embossed a grey panel with a spider's web embossing folder went over the raised parts and edges with white pigment ink. Then I matted it with a lilac panel and adhered it to an orange card base. Next, I created the sentiment strip, which I adhered with foam tape. 
By the way, I didn't have lilac cards stock, so I used white and coloured it with an alcohol marker. 

The spider is a cheap plastic Halloween prop, adhered with hot glue. It's rather bulky, but none of the cards went in the mail, so who cares. 

For the envelopes I just doodled a spider on a string and a few webs. The cards were all the same, but each of the envelopes was a little different. 


Normally, our house is not open to the street, the entrance is behind a high gate, so no one can look into the garden. But for the occasion we opened the gate and decorated the cobbled front area near the entrance. There is a second, very old gate a few meters further back, which we closed instead, so the garden was still closed off.  

We carved a pumpkin, set up three store bought gravestones and lighted a few red grave yard candles around them. Although that doesn't sound all that special, it looked pretty cool. 


Inside we decorated quite a bit more. Most of the things are handmade, or altered somehow and most ideas are from the internet.

First off, a flock of hand cut cardstock bats. They cost me several evenings, but were totally worth it. 


When I found the printable Harry Potter labels  on the Internet, I instantly decided, that I need a devil's workshop. So I collected all kinds of small bottles for a while and tried to make the best of them. The ones that didn't let go of their labels easily, I painted black.


This one is hard to see, because I had to take the picture against the sun. I used heaps if small plastic spiders (the same ones I had on the invitations) and sewed them to my kitchen curtain. I also stuck some on the wall and the window pane, so it would look like they were crawling from all directions (actually only three directions) towards a little cracked hole in the window. The crack I sketched on with a white-out marker. 


My mother in law had some old white candles that had lost their form a bit over time. I made good use of them, by dribbling on red wax from another old candle around the top and letting it run down. I put them up all over the house, but unfortunately I didn't take a picture of them in place. This picture I took when I created them, to show my friend how creepy they turned out. 


For the Halloween sweets I used mason jars in different sizes. and printed out some Harry Potter sweets labels, which I didn't adhere to the jars, because I wanted to re-use them for something else. Instead I folded the labels like a place card and placed them next to each jar. 

The star among these were definitely the eye balls. I personally think they are totally disgusting, they are wobbly and look way to real for my taste. But the kids all love them. We get them for every Birthday, no matter what the motto is. 

In the jar on the second photo are jelly beans, ahem, every flavor beans. On the last picture, there are spider-lollipops, created with a lollipop, googly eyes and black pipe cleaners. 


This is one of the soap dispensers I prepared. I removed the label and somehow managed to get the plastic skeleton through the opening. That was a pretty tight fit, and it helped a lot that it was a rubbery, bendy plastic. I prepared a second dispenser with rubbery cockroaches, which creeped me out myself, every time I went into the bathroom. I really regret not having a picture to show you. 


Unfortunately there are some more pictures missing. We hung artificial spider's webs in all kinds of places, especially in the bathroom were the wall is kind of catchy and keeps the webs in place perfectly.
A  white towel with bloody hand marks was hung over the bath tub as if it belonged there. We also hung up a few Halloween lanterns and garlands and used heaps of old jam jar mummy lights to light the place. I didn't want to burn the tall bloody candles, but in the glass jars I decided open fire was safe enough.  

Last but not least of my party decorations, I spent weeks (a lot of drying time) creating spell books for the event. I found this idea, like so many, on the internet. I used old hardcover books, glued on plastic toys and some additional details, like the spider's web (hot glue), the corners and stipes (self-adhering magnetic tape, just because it was lying on my desk and had a straight edge) and the die cut letters (fun foam) for the titles.

When all the glue had dried, I covered the books with mod podge and a single layer of paper towel, making sure there were a lot of nice creases and wrinkles, but at the same time as much detail as possible on the plastic toys and letters.

After this was dry, I painted the books with acrylic paints (black and dark brown) and after yet more drying time I brushed on either gold or silver acrylic paint, to enhance all the details.

These are only some of the books I created, again I don't have pictures of all of them.
Later on I created even more books as Christmas gifts for my girls and their Dad. For those I used cheap empty note books and adhered the names instead of grimoire titles.
   

Right from the start I also had the idea to create "the Monster book of Monsters" from Harry Potter, but didn't have a good idea. Until one day inspiration sparked. I decided to cover the largest of my books with fur and glue vampire's teeth to the edges, like in the movie. I found the perfect greyish black werewolf fur in a shop and the perfect yellowed teeth in the super market. Then I wrote the label with a silver pearl maker pen and fixed it to the fur with some brads that look like screws. The teeth I had to trim a bit, so they would fit better on the straight edge and adhered them with hot glue directly to the book. There is a slit in the fur there.

What you can't see in the picture: I used a shortened old belt to tie it shut. We wouldn't want our guests to get bitten, would we? 


Of course, no party could end without treat bags for the guest to take away. We filled rubber gloves with sweets and  adorned each with a plastic spider ring, that was in one of the deco packs we bought.
As you can see, Nala, the cat, was very interested - she's always were the fun is...


And at the very end: here is it all, nearly packed up. Party in a box for next year. Only 279 days to go.


Creepy Halloween greetings
Ela

Saturday, 14 November 2015

Challenge up your life: Challenge #28 White & Gold

Hello Crafters,
guess what, it's Challenge time again. This week's theme is: 


Challenge #28 White & Gold


over at


I have a different project for you today, no card, but a book.


I die cut the letters and stars from fun foam and adhered them to a cheap notebook from the Dollar store. Then I covered the front and back with one layer of a paper towel and lots and lots of Mod Podge. I made sure to create some nice wrinkles in the paper.

Then I painted the finished cover with acrylic paint and as a very last step I lightly brushed on some gold acrylic paint.

To hide the mess I made on the inside of the cover, I simply adhered a piece of scrapbook paper. 


I created three notebooks this way, to give away for Christmas. The others are in colour, so they don't match the challenge, but I'll show them anyway, just to make the set complete.


And the Insides

 Now I'm looking forward to your creations in Christmasy elegant white and gold!

Have fun
Ela

Monday, 7 September 2015

Back to school

Hi Crafters, 

where we live, school is starting today. I honestly wish it wouldn't. I really enjoy not having to drive the girls to school every day and not having to send them to bed at any specific time. The summer holidays are always a time of easy going.

Well, it can't be changed, we enjoyed our holidays, and now it's back to business for all of us.

Also my friend's daughter is starting school this summer, and I created a card for her. I don't own a single stamp set for school, so I had to make do with what I had. 


I decided to go with a chalkboard again. I did that before and it's relatively easy, always effective and so fitting, for a school card. So I created a black panel and a craft coloured matte for it. I stamped the matte with my wood grain stamp in brown ink, so it looks like a wooden frame. Then I stamped the sentiment and little images on the black panel and heat embossed them in white. After that I sponged white pigment ink around the edges and over the panel, to make it look like a half cleaned chalk board. The tag was made in the same way.

For the card I wanted an animal to look at the board, so I checked all my critter stamp sets. The little fox from Avery Elle's "more stories" was perfect, but I wanted him to have a school bag. As I don't have such a stamp I checked the Internet for a nice clip art as an example and drew the bag and apple myself on water colour paper. Then I masked off the right side and stamped the fox. 

I watercolour the image with my inktense pencils and fuzzy cut it.

For the card base I had planned to adhere lots of die cut letters white on white to create a faux dry embossed look, but that was too plain and boring. After all, that's for a 6 year old, it should be fun. So I decided the card needed more bright apple green, to tie in the leaf of the apple. I die cut the letters in green instead and adhered them at random on the white card base. 


At last I assembled the card, mounting the fox on foam dots and added glossy accents to the apple and hearts and some silver pearl pen on the buckles of the bag.

For the envelope, I picked a matching bright green ready made envelope and just adhered the letters in white.

I must say, I love how that card turned out. The bright green really makes me happy and it even fits with gift we picked, a book about an inventive frog.

I think I'll create the same card again, because there are still some more kids among our friends who will start school next year, or the year after.And those friends don't know each other, so they will never know. ;)


I hope you all have a great day!

Hugs
Ela

Tuesday, 23 June 2015

Private Investigators Birthday

Hi Everyone,

it's time to show you what I've been doing those past weeks. 

It's been my girls' Birthday last week so I spend the last few weeks with preparations. The motto was private investigators. Here are the invitations I created.


Very simple, I printed the word (it means Invitation) in red on white card stock and cut the card stock to panels. The font is called "Top Secret". Then I stamped the foot prints all over the panel and adhered it to a grey card base. The stamps I already had left over from a previous project. I cut them myself from fun foam.

I printed the words "Streng Geheim" (Top Secret) in the same font and colour across the envelopes, but unfortunately forgot to take a picture of them.

Next task were the giveaway bags. I got some sweets, cheap toy handcuffs and invisible pens (to be read in black light) for all of the kids. I also printed out a Caesar cipher disc from the Internet and I got a bunch of little note pads, that I made into personalised note books. I am pretty proud of these. 


I cut and scored a black card stock cover to match the pad and stamped the front and back with white foot prints. Then I adhered the red die cut letters (Tim Holtz Alphabetical) to the front, mixing upper and lower case letters. 
In order to get the letters straight, I always arrange them and then use a strip of post-it tape to keep the spacing, leaving the lower edge free of tape, so I can see were exactly I place the word. Then I use liquid glue to adhere them down and let them dry a bit before removing the tape carefully. On the next picture you can see how the note books look when opened.

Of course all those goodies needed to go in a bag. Usually I use small store-bought gift bags and modify them to match the motto, but there are no black gift bags, at least not where I live. So I had to think of something else. Luckily I still had plain white treat bags, about the size to fit a card. 

I needed a good way to close them, therefore I die cut the Stampin' Up "Top Note" die from black card stock and scored it in half. Then I stamped white foot prints across it.
With the books personalised, I needed name tags on the gift bags, but I didn't want to go through all the fuzz with the die cut letters again (we had invited 16! kids...). Therefore I just printed the names, cut them out and adhered them to the black card stock.


Then I filled the bags and stapled the card stock over the top. The hand cuffs didn't fit in, so I used a piece of baker's twine to keep keys and cuffs together and attached them to the bag with another staple, hidden underneath the black top.

For the day itself we prepared a little treasure hunt or actually a private investigator training programme, including games for team work, agility, speed etc. We also included the cipher disc and invisible pen that would be in the treat bags at the end, so they had to decode and puzzle a little as we went along. 

At the beginning of the party we took a picture of each child, so before leaving, they would not only get their "set of basic equipment" (the treat bags), but also their personal "Private Investigator ID card".

I had prepared a word file ready for print with all the cards already filled in, so that I had to add only the pictures during the party. The photo would be were the fingerprint is in my example. After printing I just had to cut them with my guillotine, round the corners and put them in their clips.

We had a great day, the kids loved it all. 

So, that's it from me for today, have a great day
Ela