Showing posts with label Mixed Media. Show all posts

Tuesday, 22 October 2019

Acrylic pouring card

Hello Crafters, 

today I have a very different card for you. 

I have been fascinated by the acrylic pouring technique for quite a while now, but it's such a mess, I never dared to try it myself. I can just imagine my cats spreading the colour all over the house. 

Then I found out that one of my colleagues actually does that a lot with his daughter. Mostly on smaller canvases, but eventually with the aim to create some nice big ones for their home. Seeing all of their lovely works hooked me even more, but I am still not happy with how messy that gets. 

And I really don't want to hang so many big canvases either. So I thought of a way to get it out of my system in a card sized way. 

Since paper would warp too much with all the fluids, I got myself very thin (2 mm I think) pieces of balsa wood. It's so lightweight and thin that you can cut it with a craft knife.

Here is my first attempt still in progress.


As you can see, the thin wood warped quite a bit, but it flattened out when it dried. For good cells you need silicone and I didn't have any, but I am still rather happy how it turned out. I adhered the finished piece on a black card base and a added a die cut sentiment. I was fiddling around a lot trying to decide between a black and white sentiment, and in the end I offset the white on on top of the black one to create a shadow effect.


It's a bit bulky, so probably requires extra postage, but I hand delivered mine so it didn't matter. And I totally think the extra postage would be worth it.

Sadly I haven't managed to create any more panels since the first one, but it's firmly on my to-do list. Especially since I now do have some silicone and I still have lots of wood left. 

And also, I bought a big canvas for a "family pour". If it turns out well, it's meant to cover up the large and ugly heater in the hallway.

Let be know if you have ever tried that technique, I am happy for any tip I can get.

Hugs 
Ela


Challenges:
Seize the Birthday: Anything goes Birthday
The Paper Players: #464 Say it Loud
CAS on Froday: #166 Big Sentiment or Word
Day of the month Card Club: #8 World Cardmaking Day 


Friday, 20 September 2019

3rd time aunt - cards and gifts

Hey Crafters, 

today is a happy day, my third niece was born last night, just before 11 pm. Only one day after grandpa's Birthday and an easy date to remember. Both, mother and child are healthy and Happy.

The news of my sister-in-law in hospital left me frantically busy, because - guess what - with a 10 month delivery time, I had neither the gift nor the card completely ready. All planned out though, but not completed. 

So, first things first, here is the card. 


I wanted something clean an simple and had that idea of a landscape card with the name across it in the lower third and some embossing paste stencilling in the background. Turned out, the name is too short, it just didn't fill enough space, with the only large letter cutting dies I own. So I changed the plan to portrait, with otherwise much the same concept. To make the letters shine, I ink blended an ombre effect. I probably should have gone a bit darker near the lower edge.

The changed format left way too much empty space at the top of the card, so I needed a cute image to fill it.

Checking my options I decided on the adorable Mama and Baby bear. I coloured them with alcohol markers, which I hadn't done in quite a while. I almost gave up, it just didn't seem to work, but in the end I persevered and I think the final result is okay. 

I added a black sentiment strip that says "Hallo", to spell out "Hallo Luise" and to tie in the black outlines of the image. I originally wanted to spell "Welcome", but Hello was the best I could find in my stash. 

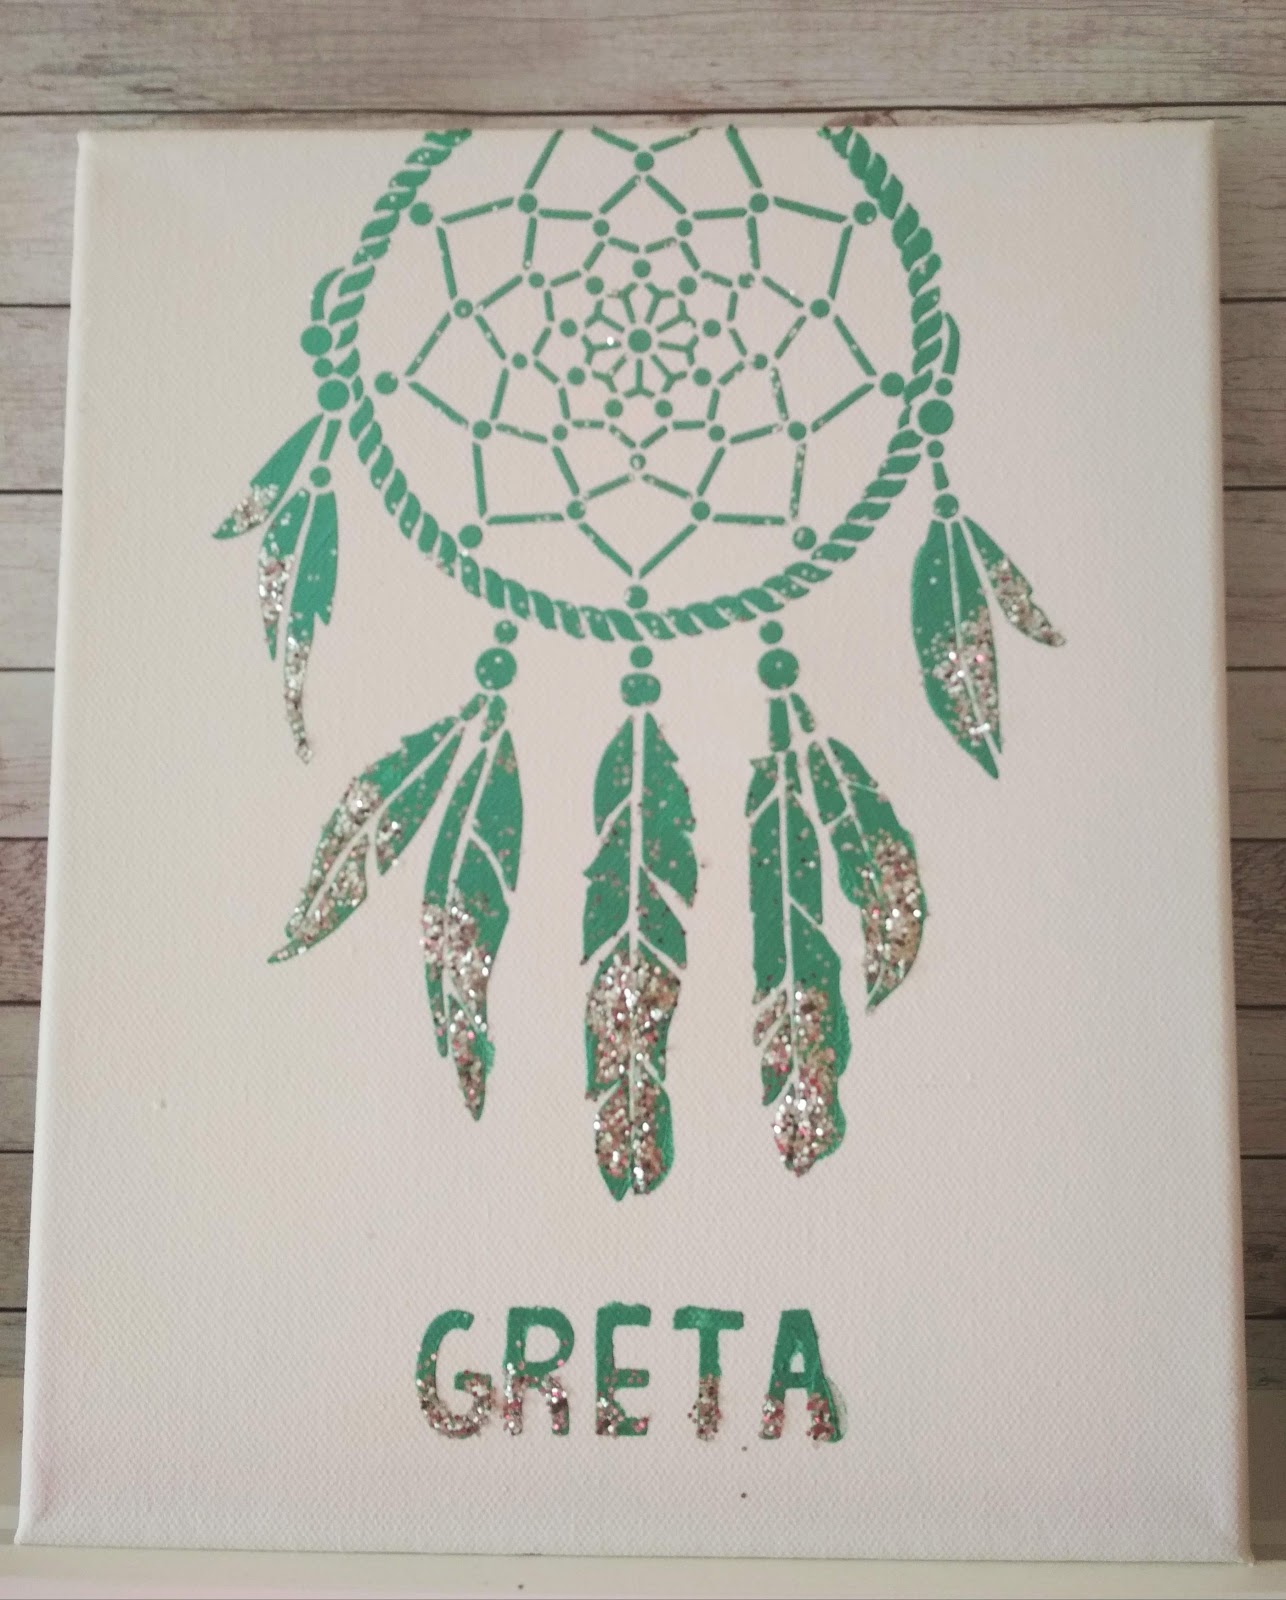
While the embossing paste still dried, I cleared up my stencil and happened to glance at a larger stencil in my stash, that I used on some T-Shirts for my daughters. That sparked the idea, to create a canvas as well. I happened to have 2 canvases of the same size, so I created one for the Baby and one for the older sister as well. 
I actually would have liked to do an ombre here as well, but I didn't have matching colours, so I glittered it up instead.


And finally, here is my first ever diaper cake. I had the ingredients lying around for ages, except for the diapers, which I only bought yesterday. 


Well, that's it from me, I need to get to work, it's going to be a busy day, especially since the happy parents are already home and  ready for visitors. 


Lots of love
Auntie Ela


Challenges:
AAA Cards: #149 - Up to One Third
CAS(E) this Sketch: #340  (it's a bit loose, I hope it still counts) 


Thursday, 14 May 2015

Happy Father's Day

Hi Crafters,

I'd like to wish you a happy Father's day today, even if most of you won't be fathers. 

My girls created a picture for their Dad this year, with my Dylusions spray mists and our only Dylusions stamp set.


I created the canvas background for them, just because it was so messy and it needed a lot of drying time, for which they don't have the patience. I also stamped out the images and helped with cutting and adhering, but the rest was all done by them. 

We also had a leftover crab that didn't make it on the canvas, so I created a card for them to write. I cut a card base from water colour card stock and painted in the sky and sand, adding small dots in darker water colour and white gel pen to give the sand some texture. Then I coloured a piece of card stock with a brown alcohol marker and created the wooded look with white pigment ink and brown shadow ink, direct to paper. Then I added some lines for the planks and some white accents with a gel pen and embossed the sentiment for the crab to hold up.
 

I love how it turned out.

Have a great day
Ela

Sunday, 12 April 2015

Holidays and art journaling

Hey Crafters,

my girls and I have just returned from a week with my parents in the Alps. We had wonderful warm and sunny weather most of the time and spent a lot of time outdoors near the creek, which is our favorite place there. My daughters even complained that I "forgot" their Bikinis.

My parents are moving to a smaller place, where there isn't enough space for us to stay next holidays. So we also booked our summer holiday there at a local farm and now we're looking forward to it so much. They have cows and horses, cats naturally and I think sheep too. The girls are all crazy for it already.

Back home here, the cherry tree is in full bloom, and I admit I am glad to be back. I enjoy staying there, but it's always rather tiresome, because the kids need to be quiet and behave around my parents (my mother is ill and my father has always been one for calm and quiet).

Well, enough about my holiday plans, here's some crafty news:

I did it, I allowed myself the guilty pleasure of ordering twelve of Dyan's Dylusions spray mists.


I love to finally have them, I fell in love with them the moment I first saw them. And again a few weeks back, when I re-discovered Dyan's journaling for myself.

I also created my first page, just to try out some techniques with them...


I picked tones of pink, red and orange for the base, did some ghosting with stencils and a bit of regular stenciling. Then I covered the top and right edge with black and tried out the bleaching technique with my WPlus9 butterflies.

To do that, you stamp the images with black archival ink onto the black. Then you lift up the black color within the stamped images with  a wet brush and remove it with a paper towel. You may have to do that several times. Then you replace the black ink with another color, in this case I used pink and some orange for color variation. Dyan filled water brushes with her spray mists and uses them, but I didn't want to invest in all these water brushes, so I just dropped a bit of the color onto a slick surface and used a regular brush to pick it up.

I stamped another butterfly on a separate piece of paper, colored it, cut it out and adhered it with the wings lose. Then I stamped some weeds along the bottom and added some faux stitching. The text is handwritten an cut out crookedly.

I am not really all that happy with it, I think the paper may have too much texture for this technique, and I feel like I don't have enough space to leave different pieces out to dry and work on several backgrounds at once.

I share my craft desk with my kids and there is the box with all the pens, pencils, tools and stuff on the desk as well, so I don't really have that much space to spread out on.
This has been bothering me for a while, because I'd really like my crafty area better organized, but I also don't want to spend a lot of money on new furniture or ruin the look of my living room even more.

Well, I'll keep pondering that problem, maybe I'll find a solution eventually.


Happy crafting
Ela

Saturday, 4 April 2015

Challenge up your life: Challenge #12 Embossing


Hi Crafters, 

another two weeks have passed like nothing, spring should be serious about its business now, but it's letting us wait. It's been cold, wet and stormy the past week. 
Anyway, it's time for another challenge over at


This time we are challenging you to bring texture to your cards:

Challenge #12 Embossing


Heat or dry embossing or embossing paste, that's completely up to you, just have fun with it.
I decided to create another mad doodle card, with lots and lots of bright colors and combine it with black embossing paste.


After I defined the areas with a black Copic Multiliner, I filled them with different patterns. Then I colored all the patterns with bright Copics. No shading, just plain bright! Same patterns always get the same colors. After all was colored, I outlined the areas again, first with the Multiliner and then with a white gel pen, to make them more defined. I also added a sketchy white outline around the card panel. 


Then I colored a tiny bit of embossing paste with black paint and stenciled it on thickly. Here's a close up:


While the paste dried, I created the card base and handwritten sentiment, which I deliberately cut out quite crooked. When all was done and dried, I added sketchy white lines to the black bird, to define it and make it stand out more. 


By the way, my daughter also liked the bright colors, so she created something very similar, though without embossing paste. And her dedication to her projects even inspired her friends who we've had visiting the other day, to join in. Soon we had 5 kids coloring with full concentration, while my friend and I had a very calm, relaxed cup of coffee.


I hope you’ll all join us this week and create something with embossing.

Love
Ela

Saturday, 28 March 2015

Mad doodling

Hi Crafters,

today I have something entirely different to show you, though it is still a card. 

These days I stumbled across the wonderful designs of Dyan Reaveley, creator of Dylusions, and I spent about two night watching her videos. I am in love with what she does, ever since I first saw her works, but I don't have any of her spray mists and have actually shied away from the mess. I have a dedicated craft space, but it is in my living room and it's messy enough as it is.

However, right now I really wish I could afford to buy all her beautiful bright mists, and stencils and stamp sets.

Inspired by that feeling, I decided to follow one of her video tutorials and doodle a little - well a lot. 


First I created random curved intersecting lines with my Copic Multiliner. Than I picked 4-5 areas for each pattern, doodling in the spaces. With that done, I colored the patterns with bright alcohol markers. Then I traced the areas again with the black liner. 

Half way through the process, I realized that the stencil I had in mind didn't work the way I wanted it, so I changed the plan and used a flower instead, which is more intricate that I would have wanted for this. The black acrylic paint I sponged all over it seeped underneath quite a bit, probably would have been better with a more solid image (or more care). 

The edges of the black paint I faded out a little with a baby wipe. After the paint had dried, I added sketchy white doodling, a simple white sentiment banner and adhered it all to a white card base.

Admitedly, I am disappointed that he image didn't turn out as crisp, but as Dyan says: it can be messy, you needn't be neat!

I hope you'll like it, though it's so entirely different from what I usually do. Have a nice day
Ela


Challenges:
The daily marker: 30 days coloring

Saturday, 29 March 2014

Mixed Media first try

Hi Crafters,

I've been seeing a lot on the internet lately about mixed media and art journaling, it really got me hooked. When I went to the art supplies store to get some more tape runner refill the other day - I've really used a lot of that lately, with all the inlay technique cards - and I found a pad of Canson mixed media paper I simply couldn't resist.I also found some matt gel medium, and got that too.

I am not thinking of it, as an art journal, that would probably just intimidate me, but I really would like to try out new things with it.

For my first "page" I chose a rather simple flower design to go with spring, which was in the air today:


I gessoed the page and used Gelatos for the background. Then I free-handed the coulds and flower from lightweight printer paper, stamped the clouds with a background stamp and glued them to the page. The flower I coloured with orange color mist and a brown tombow marker and glued it down too. The dragonfly is stamped, sponged with distress inks, fuzzy cut and also glued on.

Stem and leaves are free-handed directly on the page with tombow markers and the rest of the shrubbery is stamped.

For the letters, I sponged some thin watercolor paper with yellow distress ink, and sponged on some leaves through a stencil, for some texture. Then I cut the letters with my big shot and a Tim Holtz die.

To add shadows I tried replacing big brush markers with tombow, and it worked well enough. I really can't afford to buy yet another sort of markers...

So, there it is, my first "non art journal page".
And I learnt a few things already, like don't use distress inks in mixed media, for anything that's supposed to stay crisp. Sponging is ok, because if it smears a bit more with the gel medium - who cares...


Have a nice day
Ela